Showing posts with label challenge. Show all posts

Wednesday, November 15, 2023

Brown butter cashew pie


This is a sponsored post by Challenge Butter, but the text and opinions are all mine. Thank you for supporting brands that make Kylee's Kitchen possible! 

I'm not entirely sure why pecan pie became the most popular nut pie. As someone whose snacking habits resemble those of a woodland creature, I eat a lot of nuts. And while I like pecans, I think cashews are far superior. Yet, I have never encountered a cashew pie. So I wanted to change that! 

Cashews are softer and a little sweeter than pecans. They taste almost buttery--all characteristics that would be tasty in a pie. When developing a recipe, I ask myself what flavor profile I want to achieve. For this pie, I wanted something complex and toasty with notes of caramel. Here's what I did to achieve that.

First, I toasted my cashews. Always, always toast nuts before using them in a recipe. A little heat "blooms" the nuts, allowing them to release essential oils that make them taste (for lack of a better term) nuttier. It also caramelizes the surface of the nuts, which means more flavor.

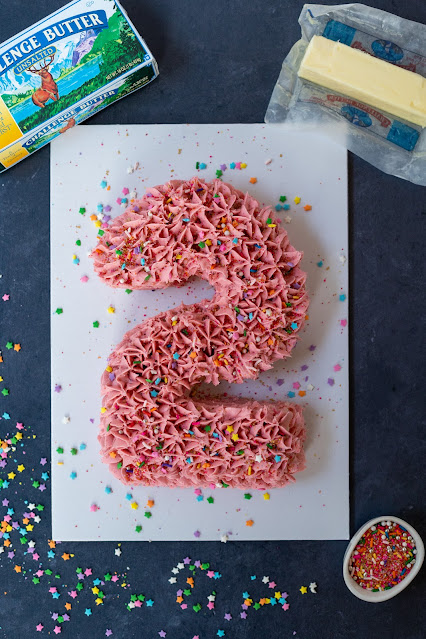
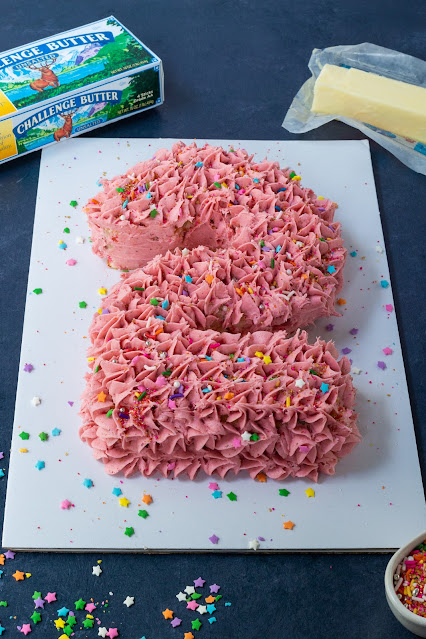
Second, if we toast the nuts, we should also brown the butter. Brown butter is butter cooked past the melting point so the milk solids caramelize. This results in a nutty, caramel-like flavor. You can make brown butter by melting butter on the stove. The butter will sizzle, bubble, and foam, and then you'll see amber-colored flecks on the bottom. Start with a good quality butter for the best flavor. I always use Challenge unsalted butter. Challenge butter is made with 100% real pasteurized sweet cream. That’s it. Nothing artificial or synthetic. 

Third, there are two types of corn syrup: dark corn syrup and light corn syrup. Using the two interchangeably won't affect the structure of the recipe, but it will affect the flavor profile. Light corn syrup tastes mild with hints of vanilla. Dark corn syrup contains molasses and has a more robust, deeper sweetness. That's why I use dark corn syrup in this recipe.

There is one more ingredient that will contribute to the flavor profile we're trying to achieve: bourbon. The alcohol in bourbon cooks out during baking, resulting in a rich, nutty flavor that really enhances the other flavors.

Once you toast the nuts and brown the butter, the filling for this pie quickly comes together!

A quick word on pie dough: You can make pie dough and store it in the refrigerator 2-3 days in advance. Or you can store it in the freezer 3 months in advance. Just make sure to pull it out of the freezer 24 hours before trying to roll it out. If you choose to buy pie dough, I recommend using one make with all butter. In my opinion, the Trader Joe's pie crust is the only pie crust worth buying.


Brown butter cashew pie

Yield: 8 - 10 slices

Time: About 90 minutes

Ingredients

  • 6 Tablespoons Challenge unsalted butter
  • 2 and 1/2 cups (250g) cashews, toasted
  • 3 large eggs
  • 1 c (240ml) dark corn syrup
  • 1/2 c (100g) dark brown sugar
  • 2 Tablespoons bourbon
  • 2 teaspoons vanilla
  • 1/2 teaspoon salt
  • 1/2 teaspoon ground cinnamon
  • Dough for 1 (9-inch) pie crust

Directions

  1. Heat butter in stainless steel pot with high sides over medium-high heat. Stir frequently. Butter will sizzle and foam. Once milk solids look golden brown and smell nutty, remove pot from heat and pour butter into bowl. Set aside and allow to cool.
  2. Preheat oven to 350 degrees Fahrenheit. Spread cashews in even layer on baking sheet.
  3. Toast cashews for 10 minutes in oven, stirring every few minutes. Cashews are done when lightly browned.
  4. Whisk eggs, corn syrup, brown sugar, bourbon, vanilla, salt, and cinnamon. Add cooled brown butter. Set aside.
  5. Roll out chilled pie dough into 12-inch diameter circle. Place dough in 9-inch pie dish. Fold overhanging edges back over itself to create sturdier crust. Use fingers to flute edges.
  6. Spread toasted cashews evenly inside bottom of pie crust. Pour filling over cashews.
  7. Place pie on baking sheet and put in oven. Bake for 50 - 55 minutes, or until the top is golden brown and the filling is just set. If necessary, place crust shield over pie edges if crust is browning too quickly. Or tent aluminum foil over top of pie if it is all browning too quickly.
  8. Remove pie from oven and place on cooling rack.
  9. Slice and serve pie with whipped cream or ice cream once cooled.
  10. Store leftover pie in refrigerator for up to 5 days.


Friday, September 29, 2023

Coffee-flavored coffee cake


This is a sponsored post by Challenge Butter, but the text and opinions are all mine. Thank you for supporting brands that make Kylee's Kitchen possible! 

Coffee cake is not typically flavored with coffee—it gets its name from the fact that it's meant to be eaten with coffee. But on honor of National Coffee Day, I was inspired to make a coffee-flavored coffee cake so you can have your coffee and eat it, too! 

I incorporated coffee into each of the three parts of this cake: the crumble, the filling, and the cake itself.


There are a few things I want to point out about this recipe. 

Many coffee-flavored baked goods use espresso powder, but I used finely ground coffee instead. We purchase coffee beans from local Indianapolis roasters (primarily Helm, Blue Mind, and Tinker). These locally roasted beans have an incredible amount of flavor. So I ground about 20 grams of beans at the finest setting on our grinder, and I used the ground beans instead of espresso powder. If you don't have access to a grinder, you can use espresso powder instead.

Coffee concentrate is highly concentrated coffee. My husband and I make coffee concentrate using beans from our local roasters, and then we use that concentrate for cold brew. If you don't want to make your own concentrate, you can buy it from the store or you can brew a really strong cup of coffee and then let it cool.

As you can tell by reading this blog post, I put a great deal of effort in making sure I use high-quality ingredients to achieve the best tasting product. If I'm going through the effort in grinding my own beans and making my own concentrate, the rest of the ingredients I'm using better be high quality. That's why I only use Challenge butter in my recipes. It creams better, it tastes better, I could go on and on... and it contains no artificial or synthetic ingredients.

I hope you enjoy this coffee cake with your morning (or afternoon or evening) cup of coffee! Stay caffeinated, friends! 


Coffee-flavored coffee cake

Yield: Makes 1, 9x5-inch loaf cake

Time: About 2 hours

Ingredients

For the crumble

  • 1/2 cup (100 grams) light brown sugar
  • 1/4 cup (50 grams) all-purpose flour
  • 4 Tablespoons (1/2 stick) unsalted Challenge butter
  • 1 teaspoon finely ground coffee beans
  • Optional: 2 ounces pecans, chopped 

For the filling

  • 1/4 cup (50 grams) light brown sugar
  • 2 Tablespoons (15 grams) all-purpose flour
  • 1 teaspoon finely ground coffee beans

For the cake

  • 1 1/2 cups (180 grams) all-purpose flour
  • 2 teaspoons cinnamon
  • 1 teaspoon baking powder
  • 1/2 teaspoon baking soda
  • 1/2 teaspoon cardamom
  • 1/2 teaspoon kosher salt
  • 3/4 cup (180 milliliters) sour cream
  • 1/4 cup (60 milliliters) coffee concentrate
  • 8 Tablespoons (1 stick) Challenge unsalted butter
  • 3/4 cup (150 grams) light brown sugar
  • 2 Tablespoons finely ground coffee beans
  • 2 large eggs

Directions

For the crumble

  1. Mix brown sugar, flour, butter, ground coffee beans, and pecans until you have large crumbles. Set aside.

For the filling

  1. Mix brown sugar, flour,  and ground coffee beans. Set aside. 

For the cake

  1. Preheat oven to 350 degrees Fahrenheit. Line 9x5-inch loaf pan with parchment paper or spray with nonstick spray.
  2. In medium-sized bowl, mix flour, cinnamon, baking powder, baking soda, cardamom, and salt. Set aside.
  3. In small bowl, mix sour cream and coffee concentrate.
  4. In bowl of stand mixer, beat butter, brown sugar and ground coffee with paddle attachment on medium speed until light and fluffy. Scrape bowl. 
  5. Add eggs 1 at a time while mixing on low speed.
  6. Add dry ingredients in 3 additions, mixing until just combined and alternating with sour cream-coffee mixture in 2 additions. Scrape sides of bowl after each addition.
  7. Pour half the cake batter into the loaf pan. 
  8. Sprinkle filling mixture over top of cake batter.
  9. Spread remaining cake batter over filling and sprinkle crumb mixture over top of cake batter.
  10. Bake for 45 to 50 minutes, or until cake is baked through. Cake should spring back when touched.
  11. Allow cake to cool in pan for about 20 minutes before cutting or trying to remove from pan.


Thursday, May 4, 2023

Parmesan Asparagus Puff Pastry Tarts


This is a sponsored post by Challenge Butter, but the text and opinions are all mine. Thank you for supporting brands that make Kylee's Kitchen possible! 

Puff pastry can really elevate any dish. It's light and flaky and bakes up golden brown. I've always loved its versatility. It's the star of multi-layer desserts like a French Napoleon. Or twist it with parmesan for simple and thoroughly delicious cheese straws. Recipe developer Lily Ghodrati recently posted a video on TikTok featuring honey, nectarines, and puff pastry. She baked the tarts with the puff pastry on top and flipped them over after baking, very much like what you would do with the classic French dessert tarte tatin. Her video went viral, garnering over 45 million views. It has since spurred many other creators to share savory and sweet puff pastry videos using the same method with the puff pastry on top. The benefit of baking with the puff pastry on top of the filling is that the puff pastry stays flaky and crisp without the filling making it soggy.


I decided to hop on the upside down puff pastry train as well with parmesan asparagus tarts. I started with a layer of parmesan cheese, topped with asparagus and prosciutto, and then slathered in compound butter before finishing with a strip of puff pastry. When baked upside down, the parmesan forms a crispy crust. And the compound butter infuses everything while allowing the puff pastry to remain crispy. I used Challenge Unsalted Butter to make the compound butter. Challenge Unsalted Butter is 100% real cream butter—nothing artificial or synthetic.

There are a few things to keep in mind when working with puff pastry:

  • You can make your own puff pastry, but the only time I've done that is in culinary school. If you buy puff pastry, look for all butter dough. It makes a big difference.
  • Make sure the puff pastry is thawed, but it still needs to be cold. It shouldn't be room temperature. You want the buttery layers to remain separate. Work quickly once it is thawed.
  • Make clean cuts so you don't crush the layers, which would prevent it from puffing.

Parmesan asparagus puff pastry tarts

Yield: Makes about 12 tarts

Time: About 30 minutes

Ingredients

For the compound butter

  • 1 stick of Challenge unsalted butter, room temperature
  • 2 garlic cloves, minced
  • 1 Tablespoon parsley, minced
  • 1 Tablespoon chives, minced
  • 1/2 teaspoon lemon zest
  • 1/4 teaspoon kosher salt

For the tarts

  • 1 roll puff pastry, thawed but still cold
  • Parmesan cheese, grated (you’ll need about 1 cup)
  • 12 asparagus spears, woody ends removed
  • About 3 slices prosciutto, cut in fourths
  • Egg wash (1 egg mixed with 1 Tablespoon water)

Directions

  1. Preheat oven to 425 degrees Fahrenheit. 
  2. Cut puff pastry into 12 equal pieces. Return to refrigerator.
  3. Mix compound butter ingredients together. Set aside.
  4. Prepare baking sheet with parchment paper. 
  5. Sprinkle parmesan cheese in strip about the length of an asparagus spear in one corner of parchment paper. 
  6. Place 1 asparagus spear on top of parmesan.
  7. Place 1 piece prosciutto on top of asparagus.
  8. Place about 1 Tablespoon compound butter over prosciutto.
  9. Remove puff pastry from refrigerator and lay one strip over prosciutto. Brush with egg wash.
  10. Bake for 12 - 15 minutes or until puff pastry is golden brown.
  11. Remove from oven and flip each tart over before serving.

Sunday, October 30, 2022

Halloween hand pies


This is a sponsored post by Challenge butter, but the text and opinions are all mine. Thank you for supporting brands that make Kylee's Kitchen possible! 

I'm talking about hand pies two ways today with both a savory and sweet option. A hand pie is essentially just a mini pie that you can hold in your hand. You can make it with puff pastry or pie dough. The filling can be a homemade pie filling, or you can use store-bought ingredients to make a delicious treat.

Since we're celebrating Halloween, I thought it would be fun to make hand pies in a super literal sense—pies with eyes (I wanted to spell it p-eyes, but I didn't think it would make sense) and pies shaped like hands!

You can use any type of filling, puff pastry, pie dough that you want. It's kind of like a "choose your own adventure" book. I like to buy my puff pastry and make my pie dough. Trader Joe's carries the best puff pastry, hands down (that's a Halloween hand pie joke)! It's seasonal, and they only carry it in the fall leading up to Christmas. So stock up while you can!


If you make the pie dough, it’s important to use good quality butter. It makes a tremendous difference in your final product. I use Challenge European Style Butter when I make pie dough. It’s churned slower and longer, in the tradition of fine European butters, to produce a more flavorful butter with less moisture and higher butterfat. 

A few more tips:

It's important to roll the pie dough out to 1/8-inch thick. If it’s too thick, the crust will be gummy and chewy, not flaky.

If you're using a fruit filling, you need to make a mealy pie crust. This means the butter pieces in the dough are the size of peas. Mealy pie dough is best for fruit pies because it is good at repelling moisture from liquid fillings. If your filling isn't very juicy, you can make a flaky pie crust. This means the butter pieces in the dough are the size of walnut halves.


Spinach artichoke hand pies

Yield: Makes 3 pies

Time: 1 hour

Ingredients

  • 1 sheet puff pastry
  • 3 slices prosciutto
  • 1/2 cup spinach artichoke dip
  • 3 green olives with pimentos, cut in half
  • Egg wash (1 egg mixed with 1 Tablespoon water)

Directions

  1. Preheat oven to 425 degrees Fahrenheit.
  2. Use circle cookie cutter or jar lid to create 6 large circles on puff pastry. Use end of piping tip or other small circle cutter to create 6 small circles. Fold 3 of the small circles in half.
  3. Place 3 large circles on baking sheet and brush egg wash around the edge. 
  4. Top each large circle with 1 piece prosciutto and add about 2 Tablespoons spinach artichoke dip on top of prosciutto.
  5. Cover with large circle and seal the edge using fork prongs.
  6. Add 1 small circle to center of hand pie. Place half green olive on top. Place folded small circle partly over olive so it looks like an eyelid. 
  7. Brush the pies with egg wash.
  8. Place in oven for 15 to 20 minutes, or until puff pastry is golden brown.
  9. Remove from oven and serve.
  10. Refrigerate leftover pies and eat within 3 days.


Warm-spiced cherry hand pies

Yield: Makes 2 hand pies

Time: About 90 minutes

Ingredients

For the filling

  • 1 cup cherries (thawed if frozen)
  • 2 Tablespoons granulated sugar
  • 1 teaspoon corn starch
  • 1 teaspoon Grand Marnier
  • 1/4 teaspoon ground cinnamon
  • 1/8 ground cloves
  • 1/8 teaspoon ground allspice

For the dough

  • 113 grams (8 tablespoons or 1 stick) Challenge European Style Unsalted Butter
  • 150 grams (1 1/4) cups all-purpose flour
  • 13 grams (1 Tablespoon) granulated sugar
  • 1 gram (1/4 teaspoon) kosher salt
  • 60 grams (1/4 cup ice water)
  • Egg wash (1 egg mixed with 1 Tablespoon water)
  • Optional: 1 Tablespoon cherry jam, 10 almond slices

Directions

For the filling

  1. Mix together all ingredients and set aside.

For the dough

  1. Cut butter into 1/2-inch cubes. Place in freezer for at least 20 minutes or until very cold.
  2. In large bowl, combine flour, sugar, and salt.
  3. Cut butter into flour mixture with pastry blender or food processor until butter is pea-sized.
  4. Make well in flour mixture and add water.
  5. Mix to create shaggy mixture then knead to form dough. If dough is too dry, add up to 2 Tablespoons additional ice water.
  6. Form dough into flat disc and wrap. Refrigerate for at least 30 minutes or up to 2 days.
  7. Once dough is chilled, preheat oven to 425 degrees Fahrenheit.
  8. Roll dough out on floured surface to 1/8-inch thick.
  9. Trace hand on wax paper or parchment paper and cut out with scissors. This will be your stencil.
  10. Place paper hand on pie dough and cut out with knife. Continue three more times so you have a total of 4 hands, gathering and re-rolling dough if necessary.
  11. Place 2 dough hands on baking sheet. Brush edges with egg wash.
  12. Put 1/4 to 1/2 cup cherry filling in center of each palm.
  13. Place a second hand on top of each of the hands. Use a fork to crimp the edges.
  14. Brush the hands with egg wash, sprinkle with additional granulated sugar if desired, and place in oven.
  15. Bake for 15 to 20 minutes, or until pie dough is golden brown. Remove from oven.
  16. Spread small amount of jam onto each fingertip. Place almond slice on jam so it looks like nails.
  17. Serve immediately. Store leftovers at room temperature. Eat hand pies within 3 days.


Monday, September 12, 2022

Protein-packed pumpkin pancakes

This is a sponsored post by Challenge butter, but the text and opinions are all mine. Thank you for supporting brands that make Kylee's Kitchen possible!

I had such a hard time photographing this blog post because I couldn't stop eating the pancakes. They're thick and fluffy and so full of flavor. They're perfect for autumn, but also, I would eat these any time of year. And even better—they're actually pretty healthy. One pancake has nearly 9 grams of protein (8.6 grams, to be exact) and no added sugar. Let me break down the ingredients.


Cottage cheese: This is probably a shock to most people, but cottage cheese is the secret to tender, fluffy pancakes that are packed with protein. I recommend using full-fat cottage cheese for the best flavor. You can use small curd or large curd cottage cheese, but the benefit of using small curd is that the curds will mostly melt into the pancake when cooked. But if you use a blender, it doesn't matter. I recently discovered whipped cottage cheese at Kroger, which is perfect for this recipe because the curds aren't really visible at all.

Eggs: Eggs are pretty standard in pancake recipes, and in this case, they contribute to the structure and the protein content.

Pumpkin puree: We can't have pumpkin pancakes without pumpkin puree. I'm so glad it's finally back in stock at stores. I've never tested this, but I imagine you could use mashed sweet potatoes instead of pumpkin if you're trying to recreate this recipe when pumpkin isn't in season.

Vanilla extract: Necessary for additional flavor.

Oat flour: Oat flour is simply ground up rolled oats. I have oat flour on hand almost all the time now because oats are great for lactating moms like myself. But you can make it yourself by grinding rolled oats or old fashioned oats in your food processor or blender. Also, if you use gluten-free oats, this is now a gluten-free pancake recipe. Also, oat flour has more protein than all-purpose flour. If you don't want to be bothered with oat flour, you can substitute all-purpose flour.

Cinnamon and pumpkin pie spice: Essential for flavoring! I didn't include pumpkin pie spice in the first batch I made, and its absence was notable. If you don't have it, substitute an additional 1/2 teaspoon cinnamon plus 1/4 teaspoon ground nutmeg and 1/4 teaspoon ground cloves. 

Baking powder: Contributes to the lift and fluffiness of the pancakes.

Challenge Salted Caramel Snack Spread: The best way to top these pancakes is with Challenge Salted Caramel Snack Spread. The extra caramel flavor combined with butter is absolutely delicious.

I recommend making a big batch of these pancakes so you have leftovers for breakfast throughout the week. They last 3 days in the refrigerator. Or you can freeze them and store them for up to 3 months.

Protein-packed pumpkin pancakes

Yield: 8 pancakes

Time: About 30 minutes

Ingredients

  • 1 cup cottage cheese, small curd, full fat 
  • 4 eggs
  • 1/2 cup pumpkin puree
  • 1 teaspoon vanilla extract
  • 1 cup oat flour 
  • 1 teaspoon cinnamon
  • 1 teaspoon pumpkin pie spice
  • 1 teaspoons baking powder
  • 1 Tablespoon Challenge Salted Caramel Snack Spread
  • Optional toppings: Maple syrup, pecans

Directions

  1. Whisk together cottage cheese and eggs.
  2. Add pumpkin puree and vanilla extract and mix until combined.
  3. In separate bowl, whisk oat flour, cinnamon, pumpkin pie spice, and baking powder.
  4. Add dry ingredients to wet ingredients and mix until smooth with some lumps.
  5. Heat nonstick skillet over medium heat. Add 2 tablespoons oil (my preference is coconut oil).
  6. Once oil is hot, use scoop to place pancake batter into pan.
  7. Cook until pancakes are set around edges and golden-brown on bottom, about 3 minutes.
  8. Flip pancakes and cook until second side is golden-brown, about 2 more minutes. If you're not sure if the pancake is done, you can check the internal temperature. It should register between 190 and 200 degrees Fahrenheit.
  9. Serve pancakes with Challenge Salted Caramel Snack Spread, maple syrup, and pecans if desired.

Monday, July 25, 2022

Roasted Lemon Vanilla Glazed Carrots


This is a sponsored post by Challenge butter, but the text and opinions are all mine. Thank you for supporting brands that make Kylee's Kitchen possible!

I love making roasted vegetables for an easy side dish. Root vegetables like carrots are particularly great for roasting because their sweetness develops and becomes more pronounced as they cook. My favorite carrots to roast are Les Petites Carrots of Many Colors from Trader Joe's. I love the different colors and they're already the perfect size.


Challenge Butter recently released a variety of snack spreads, including Challenge Vanilla Fudge Snack Spread. I know a lot of people add brown sugar and maple syrup to their carrots, so I thought it would be tasty to add a little sweetness in the form of this snack spread. I balanced the sweetness with lemon zest, and they were both delicious and beautiful!


Roasted Lemon Vanilla Glazed Carrots

Yield: About 4 servings

Time: About 30 minutes

Ingredients

  • 1 - 1.5 pounds carrots, cut in half lengthwise
  • 2 Tablespoons avocado oil
  • 1 Tablespoon fresh thyme leaves, minced
  • 1/4 teaspoon kosher salt
  • 1/4 teaspoon black pepper
  • 2 Tablespoons Challenge Vanilla Fudge Snack Spread
  • 1 lemon, zested

Directions

  1. Preheat oven to 400 degrees Fahrenheit. Line baking sheet with foil and set aside.
  2. Place carrots in bowl with oil, herbs, salt, and pepper and stir to combine.
  3. Spread carrots in even layer on baking sheet, cover with foil, and place in oven for 20 minutes. 
  4. Make sure carrots are tender. If not, return to oven for 5 more minutes or until tender.
  5. Place carrots in large bowl with Challenge Vanilla Fudge Snack Spread and lemon zest. Stir gently. 
  6. Adjust salt and pepper if necessary.

Wednesday, July 13, 2022

Easiest baked macaroni and cheese


This is a sponsored post by Challenge butter, but the text and opinions are all mine. Thank you for supporting brands that make Kylee's Kitchen possible!

I realize the “best” macaroni and cheese is very subjective because many people have differing opinions when it comes to consistency, flavors, cooking method, etc. But most people get excited about any version of homemade macaroni and cheese. And I think this version is absolutely delicious. 

This recipe is extra special because you don't have to boil the pasta ahead of time! This may seem like a simple step and not much of a shortcut, but as a new mom I know any amount of time-saver, whether it be for cooking time or dishwashing time, is a big deal!

I realize this isn't the correct culinary method for cooking macaroni and cheese, and I'm mildly concerned my chefs at school will be ashamed. But as of lately, easy recipes are the best recipes, and what's most important is that this recipe is downright delicious!

What is the best type of pasta for macaroni and cheese?

Most people just use elbow macaroni pasta because “macaroni” is right in the name. But actually, pasta with ridges is far better because the sauce clings to the ridges. That’s why the best pasta to use is cavatappi. Its corkscrew shape means lots of areas for sauce to cling onto.

What cheeses are best?

Young, moist cheeses melt better than older, drier ones. So avoid cheeses like parmesan and manchego (although they could make for a good crunchy topping). I like to stick with sharp cheddar for taste, smoked gouda for complexity, and American cheese. Why use processed American cheese? Because it contains stabilizers that will prevent your cheese sauce from breaking and turning grainy. Velveeta does the same thing. I also used cream cheese in the sauce to make it extra creamy. I used Challenge cream cheese for this recipe because the taste and texture is far superior to anything else I've found on the market. That's because it's made with real milk, cream, and other natural ingredients.

Why grate your own cheese?

Yes, it is a pain, but it makes a huge difference! That’s because pre-shredded cheese is coated in additives that prevent it from clumping. But those same additives also prevent it from melting well.

What type of milk?

You want milk high in fat for an extra creamy macaroni and cheese. Some people use heavy cream or half and half, but I find it can make the dish greasy. Instead, I used evaporated milk. Evaporated milk has more protein than regular milk, but less fat than heavy cream, resulting in a creamy filling without it being too greasy.

What should you use as a topping?

I like to use extra cheese or panko because it’s light and airy, but you could use cracker crumbs, breadcrumbs, fried onions, etc. Or you could forego a crunch topping.

Easiest baked macaroni and cheese

Yield: About 6 servings

Ingredients

  • 2 tablespoons Challenge unsalted butter
  • 3 cups evaporated milk
  • 8 ounces Challenge cream cheese, room temperature
  • 2 teaspoons dry mustard
  • 2 teaspoons garlic powder
  • 1 teaspoon Worcestershire sauce
  • 1/2 teaspoon ground cayenne
  • 1/2 teaspoon smoked paprika
  • 1/4 teaspoon black pepper
  • 12 ounces extra-sharp cheddar cheese, grated (set aside 4 ounces for topping)
  • 8 ounces smoked gouda cheese, grated (set aside 4 ounces for topping)
  • 6 ounces American cheese, cubed
  • 1/2 pound cavatappi pasta, uncooked

Directions

  1. Preheat oven to 350 degrees Fahrenheit and grease 7x11-inch square baking dish with butter. Set aside.
  2. Blend evaporated milk, cream cheese, dry mustard, garlic powder, Worcestershire sauce, ground cayenne, smoked paprika, and black pepper. 
  3. Mix in 8 ounces extra-sharp cheddar cheese, American cheese, smoked gouda cheese, and uncooked pasta.
  4. Pour into prepared pan, cover with foil, and bake for 30 minutes.
  5. Uncover pan, stir, sprinkle reserved cheese on top, and bake an additional 20-25 minutes, or until the top is lightly browned. 
  6. Let cool for 10 minutes and serve. The consistency sets up like a custard.

Wednesday, April 6, 2022

Orange cardamom beer cake

This is a sponsored post by Challenge, but the text and opinions are all mine. Thank you for supporting brands that make Kylee's Kitchen possible! 

Liqueurs and spirits are common in baked goods. You may remember I’ve used amaretto, Grand Marnier, and Bailey’s Irish cream in past recipes. But have you ever considered baking with beer? 

There are actually several benefits to baking with beer. The alcohol in beer inhibits gluten formation, which results in a more tender crumb. What I mean by that is it leads to a lighter, softer texture. The carbonation in beer also acts as a natural leavening agent, meaning it helps baked goods rise. And beer also imparts flavor. What kind of flavor? Well, that depends on what type of beer you choose.

When choosing a beer for your recipe, it is very important to keep your culinary goal in mind. Porters and stouts are brewed with dark roasted malt, which means they’ll impart flavors of cocoa, dark caramel, and coffee. IPA beers are very hoppy, which means they can be very bitter. Lagers and witbiers are paler brews and will not impart much beer flavor. Lagers are very light and can be fruity, spicy, or sweet. Witbiers are also very light and have notes of citrus and coriander. Above all, bake with a beer you enjoy drinking! If you don't like the way a beer tastes on its own, you won't like the way it tastes in a baked good.

There are two strategies you can take when baking with beer. You can either add a few tablespoons for flavor, similar to adding vanilla extract. Or you can replace some of the liquid in the recipe with beer. However, beer is fat free, so if you use it to replace a liquid like milk or buttermilk, you will need to account for that subtraction of fat, The best way to do that is by adding an extra egg yolk or oil.

Here's a tip I learned from King Arthur Baking: It is important to use recently opened room temperature beer, and pour it out and let it sit for at least five minutes before using so the foam dissipates. Then double-check your measurements after the foam subsides.

The orange notes of witbiers are the inspiration behind this cake recipe. I wanted something light, breezy, and easy—perfect for a spring or summer evening with friends. The only liquids in the recipe are beer and orange juice, both of which are fat free, so I added additional egg yolks to make up for the missing fat content.

Challenge unsalted butter is my other fat of choice in this recipe. It’s churned from the freshest, purest cream without any artificial or synthetic ingredients.

Some notes before you start baking

  • If you don’t want to use alcohol, non-alcoholic beer should work just as well.
  • All ingredients must be room temperature before starting this recipe.
  • Don't just spray your loaf pan with nonstick spray, line it with parchment paper, too.
  • If you can't find cake flour, you can make it by combining 105 grams all-purpose flour (1 cup - 2 Tablespoons) and 14 grams (2 Tablespoons) cornstarch.

Orange cardamom beer cake

Yield: One 8 1/2" loaf cake

Time: About 1 hour 30 minutes

Ingredients

For the cake

  • 240 grams (2 cups) cake flour
  • 1 1/2 teaspoons baking powder
  • 1/2 teaspoon salt
  • 1/4 teaspoon cardamom
  • 117 grams (1/2 cup) beer
  • 30 grams (2 Tablespoons) orange juice
  • 248 grams (1 1/4 cup) granulated sugar
  • Zest from 1 orange
  • 113 grams (8 Tablespoons) Challenge unsalted butter, room temperature
  • 100 grams (2 large) eggs
  • 28 grams (2 large) egg yolks

For the glaze 

  • 227 grams (2 cups) confectioners' sugar,  sifted
  • 30 grams (2 Tablespoons) beer
  • 30 grams (2 Tablespoons) orange juice

Directions

For the cake

  1. Preheat oven to 350 degrees Fahrenheit. 
  2. Grease 8 1/2" x 4 1/2" loaf pan and line with parchment paper. Set aside.
  3. Whisk flour, baking powder, salt, and cardamom together. Set aside.
  4. Combine beer and orange juice. Set aside.
  5. In large mixing bowl, mix together sugar and orange zest for about 30 seconds or until orange zest is fragrant. 
  6. Add butter and cream at high speed until mixture appears light and fluffy, about 3 minutes.
  7. Add eggs one at a time on low speed, making sure batter absorbs each egg before adding another.
  8. Scrape down bowl and add half of dry ingredients. Mix on low speed until just combined. Then add half of beer/orange juice mixture. Repeat until all ingredients are used. Mix on low speed until batter is just combined.
  9. Pour batter into prepared loaf pan and bake for about 45 minutes, or until cake pulls away from edges and registers around 200 degrees Fahrenheit.
  10. Remove from oven and let cool for at least an hour before icing.

For the glaze

  1. Add beer to powdered sugar and mix. Then add orange juice and mix until smooth. Icing should be thick, but still pourable.
  2. Remove cake from loaf pan and drizzle top with icing.
  3. Wait for icing to set before cutting and serving cake.


Monday, February 21, 2022

Confetti cake with strawberry buttercream


This is a sponsored post by Challenge butter, but the text and opinions are all mine. Thank you for supporting brands that make Kylee's Kitchen possible! 

I'm celebrating Tuesday (or should I say Twosday) 2/22/22 by making a number 2-shaped confetti cake with strawberry buttercream frosting! If you are not celebrating an occasion in which the number two is involved (which is probably the case for most of you reading this blog post), the good news is that this is still an incredibly delicious cake and buttercream recipe.

Before you jump into the recipe, I want to share a few tips that are very important when making cakes.

First, ALWAYS MEASURE INGREDIENTS BY WEIGHT! I cannot emphasize this enough, and I'm sure you've heard me say this many times. It is the most accurate way to measure ingredients. And it's very very important to be accurate when baking because baking is a science. My $15 mini scale is my most used tool in the kitchen.

Second, make sure all your ingredients are room temperature. Ingredients mix together better when they're all the same temperature. Room temperature butter should still be slightly cool, and it shouldn't look greasy and melty. When you touch it, your finger should leave an imprint, but it shouldn't sink down into the butter. I only use Challenge unsalted butter in my baking recipes. It doesn't have any artificial ingredients, so the taste is pure and the flavor is consistent.

Third, spray your cake pans, line with parchment paper, and spray again. It's the best way to ensure that your cakes will easily pop out of the pans.

Fourth, do not use the "toothpick test" to see if your cake is done. It is not fail proof. There are three things I want you to do instead. The first is to lightly touch the top of the cake. It should bounce back. Next, look at the edges. The cake will start to pull away from the pan when it's done. Lastly, use a thermometer to check the temperature of the center of the cake. It should register between 200 and 205 degrees Fahrenheit.

Confetti cake with strawberry buttercream

Makes 3, 8” cakes (or 1, 8” circle cake and 1, 8” square cake)

Ingredients

For the funfetti cake

  • 680 grams (3 1/2 cups) granulated sugar
  • 567 grams (4 3/4 cups) cake flour
  • 20 grams (5 teaspoons) baking powder
  • 6 grams (2 teaspoons) salt
  • 340 grams (1 1/2 cups) Challenge unsalted butter, softened to room temperature
  • 16 fluid ounces (473 grams) buttermilk 
  • 237.5 grams egg whites (from about 7 eggs)
  • 187.5 grams whole eggs (from about 4 eggs)
  • 14 grams (1 Tablespoon) vanilla extract
  • 4 grams (1 teaspoon) almond extract
  • 3/4 cup sprinkles (130g)

For the strawberry buttercream

  • 1 cup (about 25g) freeze-dried strawberries
  • 227 grams (1 cup) Challenge unsalted butter, softened to room temperature
  • 454 grams (4 cups) confectioners’ sugar, sifted
  • 58 grams (1/4 cup) heavy cream
  • 5 grams (1 teaspoon) vanilla extract
  • 2 grams (1/2 teaspoon) salt

Directions

For the funfetti cake

  1. Preheat oven to 350 degrees Fahrenheit. Prepare cake pans by spraying and lining with parchment paper.
  2. Combine sugar, flour, baking powder and salt in large mixing bowl with paddle. Mix on low speed for 2 minutes until aerated.
  3. Add butter in small increments on low speed, scraping down bowl periodically. Once all butter is incorporated, mix on low speed for 2 minutes.
  4. Combine buttermilk, egg whites, eggs, vanilla extract, and almond extract in medium bowl.
  5. Add in 4 stages to dry ingredient / butter mixture at low speed. Scrape sides and bottom of bowl between each addition.
  6. Once all liquid is in mixing bowl, mix at medium speed for 1 minute 
  7. Fold sprinkles into cake batter until evenly distributed.
  8. Divide batter into cake pans.
  9. Bake for 30 to 40 minutes, or until top bounces back, edges start to pull away, and internal temperature registers between 200 and 205 degrees Fahrenheit.
  10. Once cool, remove cakes from pans

For the strawberry frosting

  1. Pulverize freeze-dried strawberries in food processor or blender. Set aside.
  2. Beat butter on medium speed until smooth and creamy, about 2 minutes.
  3. Add confectioners’ sugar, freeze-dried strawberry powder, heavy cream, vanilla extract, and salt. Beat on low speed until ingredients are combined. Then beat on high speed for 2 minutes. If frosting is too thick, add another tablespoon of heavy cream

For #2 cake assembly

  1. Cut small circle from center of circle cake. Remove circle from center.
  2. Cut cake in half. Cut one of the halves in half.
  3. Cut rectangle from square pan that is the same width as the circles.
  4. Put a little dab of frosting on cake board where you plan to place cake pieces.
  5. Place the half circle cut side facing down at the top of the cake board.
  6. Line up the two quarter circle pieces so it resembles the shape of the number two.
  7. Place the rectangle at the end of the second quarter circle. It should look like the number two.
  8. Frost cake and decorate with sprinkles if desired.

Thursday, January 20, 2022

Chipotle brie mac and cheese en croute


This is a sponsored post by Challenge butter, but the text and opinions are all mine. Thank you for supporting brands that make Kylee's Kitchen possible! 

Chipotle brie mac and cheese en croute

Yield: 4 servings

Ingredients

  • 2 cups macaroni pasta
  • 4 (8-ounce) wheels brie
  • 4 Tablespoons Challenge unsalted butter
  • 1/4 cup (30 grams) all-purpose flour
  • 1 cup (240 milliliters) whole milk
  • 3 Tablespoons chipotle in adobo
  • 2 Tablespoons dijon mustard
  • 1/2 teaspoon cayenne
  • 1/2 teaspoon black pepper
  • 1/4 teaspoon salt
  • 2 cups sharp cheddar cheese, shredded
  • 1/4 cup crispy jalapeño pieces (omit if you can’t find or substitute with crispy onion pieces)
  • 4 sheets puff pastry
  • Egg wash (1 egg + 1 Tablespoon water)
  • Hot honey, optional

Directions

  1. Preheat oven to 400 degrees Fahrenheit. 
  2. Fill large pot with 2 quarts water and bring to boil.
  3. Add macaroni to pot and cook 6 minutes.
  4. Set colander in sink and pour noodles into colander.
  5. Run cold water over noodles until they are cool to touch. Set aside.
  6. Use paring knife to cut circle around inner rim of each brie cheese wheel, being careful not to pierce the bottom of the wheel.
  7. Use spoon to scoop out the brie and set aside in bowl. Set hollowed out brie rinds aside.
  8. Heat large pan to medium heat.
  9. Add butter to pan. Once melted, add flour. Use spatula to stir butter and flour until roux turns blond in color.
  10. Slowly whisk in cold milk.
  11. Whisk in chipotle in adobo, mustard, cayenne, black pepper, and salt.
  12. Whisk in brie that you set aside and sharp cheddar until melted.
  13. Add macaroni to sauce and remove from heat.
  14. Stir in jalapeño pieces.
  15. Roll out puff pastry and and place hollowed brie rinds in center of each sheet.
  16. Divide pasta between each brie rind.
  17. Take each corner of puff pastry and pull it over the pasta to the opposite side of the brie rind.
  18. Brush the puff pastry with egg wash.
  19. Place brie wheels onto a baking sheet and bake for 25 to 30 minutes or until puff pastry is golden brown.
  20. Remove from oven. Drizzle with hot honey and sprinkle with additional jalapeño pieces before serving. 


Friday, October 1, 2021

Apple Cider Bundt Cake


 This is a sponsored post by Challenge butter, but the text and opinions are all mine. Thank you for supporting brands that make Kylee's Kitchen possible!

There has been a recent surge in the popularity of bundt cakes. I think it's because they look impressive, but they're incredibly easy to whip up on a whim. Unlike a standard layered cake, bundt cakes come out of the pan in a pretty design, so they don't need a lot of extra pizazz and embellishments.

What exactly is a bundt cake? A bundt cake refers more to the cake pan it is baked in rather than the actual cake itself. But traditionally it's a firm, moist cake halfway between a pound cake and a high-ratio cake.

This apple cider bundt cake incorporates cider 3 separate times: in the batter, in the cake soak, and in the icing. So it's really bursting with apple flavor!

Room temperature ingredients

  • About an hour before you start baking the cake, bring the butter and the eggs to room temperature. Room temperature ingredients mix together more uniformly and ensures the cake will bake more evenly. 
  • It is imperative that you use high quality ingredients in this recipe. That’s why I only use Challenge Unsalted Butter. Challenge uses real cream and only natural ingredients for superior flavor and an ultra smooth finish

Make apple cider concentrate

  • In order to get the strongest apple cider flavor in this cake, I made apple cider concentrate. 
  • Here’s how to make: Look at the recipe, double the amount of apple cider you need, pour it in a pot, bring it to a boil and reduce it to a simmer, continue to simmer until it reduces by half.

When baking the bundt cake

  • Before you pour the batter in the pan, make sure you’ve sprayed it heavily with nonstick spray. You can also coat the inside of the pan with sugar, and that helps too.
  • The easiest way to tell a cake is baked all the way through is by touching it. It should be firm but still spring back.
  • If you really want to make sure it’s cooked, stick a thermometer in it. It should register around 210 degrees.

Getting your bundt cake out of the pan

  • I recommend waiting about 20 - 25 minutes before inverting your bundt cake. It’s still warm enough to slide out, but it should be fully set by then.
  • If you flip it and it doesn’t come out, you can try one of these two tricks. The first trick: Heat the pan with a kitchen torch. You should be able to feel it start to slide out. The second trick: Dampen a kitchen towel and place it over the bottom of the bundt cake. The heat from the cake should create steam with the towel, and after about 15 minutes the cake should slide right out.

Infusing cake with flavor via simple syrup

  • Brushing a hot cake with simple syrup is a great way to keep cakes moist and infuse them with flavor. Simple syrup is equal parts liquid and sugar. In this recipe, the liquid I used was the apple cider concentrate for extra apple flavor.
  • Brush the cake with this simple syrup as soon as you remove it from the pan.

Icing the cake

  • Once the cake is completely cool, finish it by drizzling icing over the top.
  • The icing is just apple cider and powdered sugar. I like to make the icing really thick, but if you prefer more of a glaze, you can thin it out with more apple cider.

Apple Cider Bundt Cake

Yield: 20 servings

Ingredients

For the cake

  • 3 sticks (339 grams) Challenge Unsalted Butter 
  • 1 1/2 cups (300 grams) brown sugar 
  • 4 eggs 
  • 2 teaspoons vanilla
  • 3 cups (360 grams) all-purpose flour
  • 2 1/2 teaspoons (12 grams) baking powder
  • 2 teaspoons (5 grams) cinnamon
  • 1 teaspoon (6 grams) salt
  • 1/4 teaspoon (0.5 grams) nutmeg
  • 1/4 teaspoon (0.5 grams) cardamom
  • 1/4 teaspoon (0.5 grams) ground ginger
  • 1 cup (240 milliliters) apple cider, concentrated
  • 1/2 cup (123 grams) applesauce

For the cake soak

  • 1/4 cup (50 grams) granulated sugar
  • 1/4 cup (60 milliliters) apple cider, concentrated

For the icing

  • 2 cups (240 grams) powdered sugar
  • 1/4 cup (60 milliliters) apple cider concentrate

Directions

For the cake

  1. Preheat oven to 350 degrees Fahrenheit
  2. Beat butter and sugar on medium speed until light and fluffy, about 3 minutes. Scrape down the bowl.
  3. Reduce mixer speed to low and add eggs one at a time. Wait to add the next egg until the previous egg is fully incorporated. Add the vanilla. Scrape down the bowl.
  4. In a separate bowl, mix together flour, baking powder, cinnamon, salt, nutmeg, cardamom, and ground ginger. In another separate bowl, mix together the apple cider concentrate and the apple sauce.
  5. Add 1/3 of the flour mixture to the mixer, and mix on low until just incorporated. Add 1/2 of the liquid mixture and mix until just incorporated. Scrape down the bowl. Repeat until all the flour and the liquid ingredients are incorporated.
  6. Heavily grease a bundt pan and coat the inside with a thin layer of granulated sugar to prevent sticking. Pour the cake batter evenly into the bundt pan. Bake for 45 to 50 minutes, or until the cake is golden brown and springs back when touched.
  7. Remove the pan from the oven and cool for about 25 minutes inside the pan before inverting the bundt cake onto a wire cooling rack.

For the cake soak

  1. Mix the sugar and apple cider concentrate in a small bowl. Heat until the sugar is dissolved. Brush the cake all over with the simple syrup. Continue to allow the cake to cool.

For the icing

  1. Whisk together the powdered sugar and the apple cider concentrate. Drizzle over the cooled cake. Slice and serve.

Wednesday, August 11, 2021

Peach dumplings stuffed with goat cheese and prosciutto

This is a sponsored post by Challenge butter, but the text and opinions are all mine. Thank you for supporting brands that make Kylee's Kitchen possible!

I think we can all agree, there’s just something truly out of this world special about biting into a fresh, juicy peach. We all know peaches are delicious in pies and as sweet treats, so I wanted to show off their versatility with a dish that also incorporated their ability to pair well with more savory items.

Here’s what my Kylee brain came up with: I stuffed whole peaches with a goat cheese mixture, wrapped them in prosciutto, and then encased them in pie dough. But not just any pie dough—cheesy pie dough. Then I drizzled lemon thyme honey on top.

This dessert (we’ll call it a dessert even though it’s a perfectly acceptable breakfast, lunch, or dinner menu item) was inspired by Erin Jeanne McDowell’s whole apple dumpling recipe and golden cheese pie dough recipe from her book “The Book on Pie: Everything You Need to Know to Bake Perfect Pies,” which I highly recommend.

First, let’s talk peaches. All types of peaches can be classified as freestone or clingstone. The pit in freestone peaches isn’t attached to the flesh, so it’s easy to remove. That’s what you want to buy! Whereas clingstone peaches have a pit that is attached to the flesh, making it difficult to prep for baking or cooking. For the most part, grocery stores usually sell freestone peaches, unless you’re trying to buy peaches out of season. Then sometimes they're clingstone. So keep that in mind when you want to make something with fresh peaches not in the summer months.

Also, there are white peaches and yellow peaches. White-fleshed peaches are lower in acid and have a more subtle, delicate taste than yellow peaches. That said, white peaches are great for eating, but not the best for baking because their flavor isn’t strong enough.

I purchased peaches from Meijer a few days ago, and I noticed there were two varieties of yellow peaches: yellow peaches from Ohio and yellow peaches from South Carolina. I purchased both varieties to test them out. The Ohio peaches were significantly smaller than the South Carolina peaches and their pit was a little harder to remove, but they tasted the same to me.

My least favorite thing about working with peaches is peeling them. Yes, there are a lot of tricks for making the process easier, but I still think it’s a pain. I would just rather not do it at all, and fortunately with this recipe you don’t have to.

Fruit paired with cheese is an absolutely divine combination. I can’t resist a sweet, savory, and salty combination. It may seem strange to add goat cheese to dessert, but this tangy cheese actually balances the sweet peaches perfectly. The creamy texture also makes it a great match, and it melts into the peaches while they bake. Additionally, the prosciutto slice around the peach takes this dessert over the top. You can certainly skip the prosciutto if you're a vegetarian. But I tried the dumplings with and without the prosciutto, and its addition makes the dessert just THAT much better.


Now, let's talk pie dough. You can absolutely buy pie dough or puff pastry from the store if you're short on time. But I highly recommend making this white cheddar pie dough. In fact, my husband William said it was his favorite part of the dessert! It's a basic pie dough recipe with the addition of shredded white cheddar cheese. I only use Challenge unsalted butter when I make pie dough. It is 100% real cream butter but with no salt added. You can truly smell the difference between Challenge butter and other butters.

I know some dumpling recipes want you to cut the pie dough into squares and pinch the corners together, but I prefer to just lift the dough and bring it to the top of the peach, repeating the process untill all of the pie dough comes together where the peach stem would be. The dough will naturally fold and pleat at the top. It's going to look like a dough softball.

I bake the dumplings on a rimmed baking sheet as opposed to a dish so that the hot air hits all sides of the dumplings, creating a crisp, golden crust. 

A simple honey drizzle is a great sweet topping for the dumplings, but I wanted something with a little more pizzazz for this extra special treat. So I stuck a few sprigs of thyme in a mason jar with lemon juice and half a cup of honey, heated it up, and voila, lemon and thyme infused honey! I highly recommend making a double batch and keeping it around to drizzle in your tea, on muffins, or other desserts.

Peach dumplings stuffed with goat cheese and prosciutto

Yield: 4 dumplings

Ingredients

For the pie dough

  • 150 grams all-purpose flour
  • 1/2 tsp (3 grams) salt
  • 113 grams Challenge unsalted butter, cold, cut in 1/2” cubes
  • 113 grams white cheddar cheese, shredded
  • 60 grams cold water

For the filling

  • 4 ounces goat cheese
  • 1 Tablespoon lemon juice
  • 2 teaspoons lemon zest
  • 2 Tablespoons (40 grams) honey
  • 1/4 teaspoon salt
  • 4 yellow peaches, cut in half, pit removed
  • 4 slices prosciutto

For the egg wash

  • 1 whole egg
  • 1 Tablespoon water

For the lemon thyme honey

  • 4 sprigs thyme
  • 1 Tablespoon lemon juice
  • 1/2 cup (170 grams) honey

Directions

For the pie dough

  1. Stir flour and salt together. Add cubes of butter and mix until butter is coated in flour. 
  2. Cut butter into flour with hands or pastry cutter until butter is size of walnut halves. Alternative method: Add flour/butter mixture to food processor and pulse until butter is size of walnut halves. 
  3. Stir in cheese.
  4. Add water to flour mixture and use hands to mix until dough holds together easily. It shouldn't be totally smooth.
  5. Wrap dough in plastic wrap, form into disk, and refrigerate at least 30 minutes. Dough can be made up to 2 days in advance.

For the goat cheese filling

  1. Mix everything but the peaches and prosciutto together. 
  2. Use melon baller to scoop out some of the center of each peach half to make room for goat cheese filling.
  3. Add about 2 Tablespoons of goat cheese filling to cavity of one peach half. Place other peach half on top. Wrap slice of prosciutto around peach. Repeat with remaining peaches.
  4. Set aside while rolling out dough.

For assembly

  1. Roll out pie dough on lightly floured surface to 1/4" thick. 
  2. Cut dough into 4 even pieces. Place peach on center of one piece of dough. Gently pick up part of the dough and stretch it upward to top of peach. Continue all the way around the peach. Dough will pleat naturally. Lightly press dough down in the center at the top of the peach to seal.
  3. Repeat with remaining peaches and transfer dumplings to refrigerator for about 15 minutes or until dough is firm.
  4. Preheat oven to 400 degrees Fahrenheit. Line rimmed baking sheet with parchment paper.
  5. Make egg wash by mixing together egg and water.
  6. Remove dumplings from refrigerator and place on baking sheet. Brush dough with egg wash. Place in oven and bake 25 to 30 minutes, or until dough is crisp and golden.
  7. Remove dumplings from oven and cool for 5 minutes while you make honey.

For the lemon thyme honey

  1. Stuff thyme sprigs into microwave-safe container and pour lemon juice on top. Add honey to container and heat in microwave for 2 minutes.
  2. Drizzle honey over dumplings and serve.


Pin It button on image hover