Showing posts with label tart. Show all posts

Thursday, May 4, 2023

Parmesan Asparagus Puff Pastry Tarts


This is a sponsored post by Challenge Butter, but the text and opinions are all mine. Thank you for supporting brands that make Kylee's Kitchen possible! 

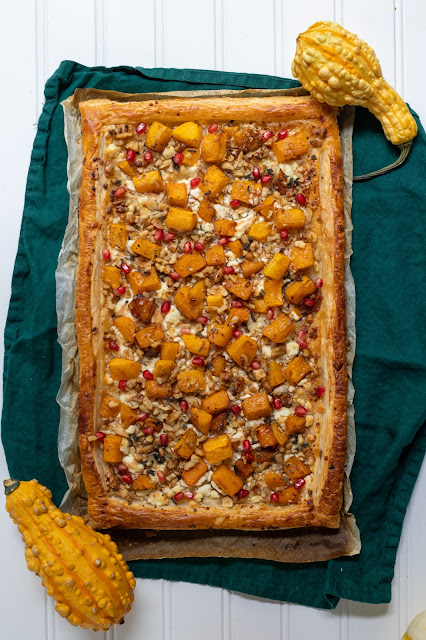
Puff pastry can really elevate any dish. It's light and flaky and bakes up golden brown. I've always loved its versatility. It's the star of multi-layer desserts like a French Napoleon. Or twist it with parmesan for simple and thoroughly delicious cheese straws. Recipe developer Lily Ghodrati recently posted a video on TikTok featuring honey, nectarines, and puff pastry. She baked the tarts with the puff pastry on top and flipped them over after baking, very much like what you would do with the classic French dessert tarte tatin. Her video went viral, garnering over 45 million views. It has since spurred many other creators to share savory and sweet puff pastry videos using the same method with the puff pastry on top. The benefit of baking with the puff pastry on top of the filling is that the puff pastry stays flaky and crisp without the filling making it soggy.


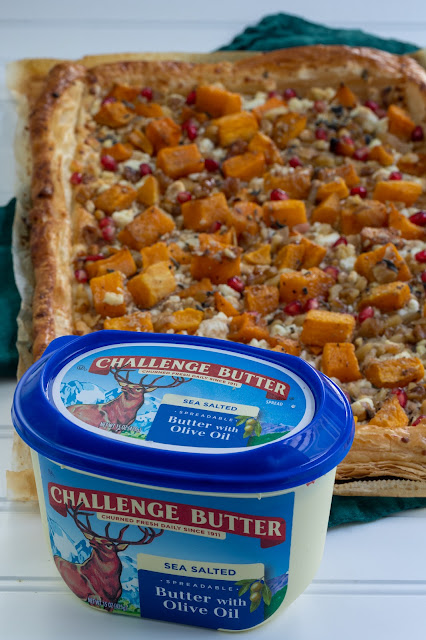
I decided to hop on the upside down puff pastry train as well with parmesan asparagus tarts. I started with a layer of parmesan cheese, topped with asparagus and prosciutto, and then slathered in compound butter before finishing with a strip of puff pastry. When baked upside down, the parmesan forms a crispy crust. And the compound butter infuses everything while allowing the puff pastry to remain crispy. I used Challenge Unsalted Butter to make the compound butter. Challenge Unsalted Butter is 100% real cream butter—nothing artificial or synthetic.

There are a few things to keep in mind when working with puff pastry:

  • You can make your own puff pastry, but the only time I've done that is in culinary school. If you buy puff pastry, look for all butter dough. It makes a big difference.
  • Make sure the puff pastry is thawed, but it still needs to be cold. It shouldn't be room temperature. You want the buttery layers to remain separate. Work quickly once it is thawed.
  • Make clean cuts so you don't crush the layers, which would prevent it from puffing.

Parmesan asparagus puff pastry tarts

Yield: Makes about 12 tarts

Time: About 30 minutes

Ingredients

For the compound butter

  • 1 stick of Challenge unsalted butter, room temperature
  • 2 garlic cloves, minced
  • 1 Tablespoon parsley, minced
  • 1 Tablespoon chives, minced
  • 1/2 teaspoon lemon zest
  • 1/4 teaspoon kosher salt

For the tarts

  • 1 roll puff pastry, thawed but still cold
  • Parmesan cheese, grated (you’ll need about 1 cup)
  • 12 asparagus spears, woody ends removed
  • About 3 slices prosciutto, cut in fourths
  • Egg wash (1 egg mixed with 1 Tablespoon water)

Directions

  1. Preheat oven to 425 degrees Fahrenheit. 
  2. Cut puff pastry into 12 equal pieces. Return to refrigerator.
  3. Mix compound butter ingredients together. Set aside.
  4. Prepare baking sheet with parchment paper. 
  5. Sprinkle parmesan cheese in strip about the length of an asparagus spear in one corner of parchment paper. 
  6. Place 1 asparagus spear on top of parmesan.
  7. Place 1 piece prosciutto on top of asparagus.
  8. Place about 1 Tablespoon compound butter over prosciutto.
  9. Remove puff pastry from refrigerator and lay one strip over prosciutto. Brush with egg wash.
  10. Bake for 12 - 15 minutes or until puff pastry is golden brown.
  11. Remove from oven and flip each tart over before serving.

Tuesday, September 28, 2021

Butternut squash and goat cheese tart

This is a sponsored post by Challenge butter, but the text and opinions are all mine. Thank you for supporting brands that make Kylee's Kitchen possible!

Butternut squash is a squash variety that has definitely increased in popularity, but I still don’t think people know entirely what to do with it. I like to roast the butternut squash so it’s a little crispy and caramelized. The resulting flavor is slightly sweet with a nutty flavor. It’s important to not overcrowd your roasting pan or the squash will produce too much steam and never get crisp.

I thought the squash would look beautiful in a puff pastry tart! First, I scored a 1/2-inch border around the puff pastry and docked the center with a fork so it doesn’t puff up too much.

Then I mixed equal amounts honey and butter, and I spread it all over the center. My favorite product to use when making honey butter is Challenge Spreadable Butter with Olive Oil and Sea Salt. First, it mixes so well and beautifully with honey. You don’t have to worry about bringing it to room temperature first. And it’s made with real Challenge Butter, which is churned from the freshest, purest cream. 

I then scattered the squash across the tart and paired it with tangy goat cheese and tart pomegranate arils. The flavors all complement each other so well, and the colors look so beautiful together!

Butternut squash and goat cheese tart

Yield: 8 servings

Ingredients

  • 12 ounces butternut squash, diced
  • 1 Tablespoon olive oil
  • 1/4 teaspoon salt
  • 1/4 teaspoon pepper
  • 2 Tablespoons Challenge Spreadable Butter with Olive Oil and Sea Salt
  • 2 Tablespoons honey
  • 1 sheet puff pastry (thawed)
  • 4 ounces goat cheese
  • 3 Tablespoons walnuts (or pecans)
  • 1 Tablespoon sage, chopped
  • Egg wash (1 egg mixed with 1 Tablespoon water)
  • Optional: Pomegranate arils, pomegranate molasses, honey, dried cranberries

Directions

  1. Preheat oven to 400 degrees Fahrenheit. Line baking sheet with parchment paper.
  2. Add butternut squash to baking sheet. Drizzle with olive oil, sprinkle salt and pepper on top.
  3. Roast for 15 minutes. Remove from oven.
  4. While butternut squash is roasting, mix butter and honey.
  5. Roll out puff pastry on baking sheet. Score a 1/2-inch border around the edges (don’t cut all the way through) and prick the center all over with a fork.
  6. Spread honey butter in center and top with goat cheese.
  7. Scatter butternut squash, nuts, and sage over goat cheese.
  8. Brush egg wash on puff pastry border.
  9. Bake at 400 degrees Fahrenheit for 20 minutes.
  10. Top with pomegranate arils and pomegranate molasses or dried cranberries and more honey if desired.

Monday, September 27, 2021

Chai-poached pear tarte tatin


This is a sponsored post by Challenge butter, but the text and opinions are all mine. Thank you for supporting brands that make Kylee's Kitchen possible!

Obviously, apples dominate the fall baking scene, but pears are also in season. And one of the easiest and tastiest things you can do with pears is poach them.

Traditionally, you want to use Bosc pears because they are firm enough to maintain their shape.

You can use any type of liquid-sugar mixture when poaching pears, but I wanted to amplify the warm fall spices that we all love during the fall season. So I brewed a strong pot of chai tea, and poached the pears in that.

You can either poach the pears whole or halved. I chose to poach them whole because I think it makes for a prettier presentation. If you also choose to poach the pears whole, you need to core them from the bottom before peeling them. Just take a melon baller and scoop out the core several times or until you don’t see any seeds.

If you choose to poach the pears as halves, you should peel first and then scoop out the core.

After sticking the pears in the simmering water, you’ll want to ensure the pears stay submerged in the liquid. The best way to do this is with a cartouche. A cartouche is simply a parchment paper lid made by cutting a piece of parchment paper the same size as the circumference of your pot. Not only does it keep the fruit submerged in the liquid, it also promotes even heating.

You want to simmer your pears until they’re fork tender. This took me about 20 minutes. Then remove them from the pot and place them in the refrigerator so they don’t continue to cook. Then you want to reduce the simmering liquid until it’s the consistency of syrup. Do this by bringing the liquid to a boil and letting it continue to boil until it’s about 1/3 the original amount. It should be the consistency of syrup.

Remove the pot from the heat and whisk in the butter. The butter will help to thicken the syrup. I use Challenge Salted Butter because it’s made from the freshest, purest cream, and they only use 100% natural products.

At this point, you can serve the pears as is with the syrup drizzled over the top, and that would make for a really elegant, delicious dessert. Or you can turn the pears into a tarte tatin. The classic French dessert is traditionally made with caramelized apples, however, it is absolutely divine with these poached pears.

You’ll want to slice up 5 to 7 pears (depending on size) into quarters, but make sure to keep one pear half as is to use as the center. Then take a 9-inch pie dish (make sure to grease well) and pour 1/2 cup of the syrup in it. Then place the pear half in the center (cut side up) and fan out the pear quarters around the center. All that’s left is to cover the pears with a sheet of puff pastry and bake!

Part of the magic of tarte tatin is that it’s flipped upside down, so the saucy pears on the bottom are flipped to the top. A lot of people say you need to do this while it’s still warm so the pastry doesn’t stick to the pie dish, but I’ve never had issues with it sticking so I wait until it has cooled. You can invert the tarte tatin into another pie dish, or if you plan on serving it right away, you can invert it onto a cake stand.

I think it tastes delicious both warm and cold!

Chai-poached pear tarte tatin

Yield: 8 servings

Ingredients

  • 6 cups water
  • 6 chai tea bags
  • 4 cloves
  • 3 cardamom pods (don’t use ground cardamom, omit if you don’t have)
  • 2 cinnamon sticks
  • 1 1/2 cups granulated sugar
  • 1 teaspoon vanilla paste
  • 5 bosc pears (you may need 6 if small)
  • 1/4 cup (4 Tablespoons or half a stick) Challenge salted butter
  • 1 sheet puff pastry (thawed)

Directions

  1. Bring water, tea bags, cloves, cardamom pods, and cinnamon sticks to boil in large pot. Reduce heat and simmer 10 minutes. Remove from heat and steep 30 minutes.
  2. Remove tea bags, cloves, cardamom pods, and cinnamon sticks and add sugar and vanilla paste to pot and bring mixture to simmer. 
  3. While waiting for it to simmer, core pears with melon baller from bottom of fruit and peel the pears. Place in pot once it comes to simmer and cover with circle of parchment paper (this is called a cartouche). Allow pears to simmer for 20 minutes. 
  4. Remove pears from pot. Bring liquid in pot to boil and continue boiling until it reduces by half and is the consistency of maple syrup (this could take upwards of 30 minutes). 
  5. Whisk in butter and salt.
  6. Cut pears into quarters, but make sure to keep one half in tact for the center.
  7. Preheat oven to 375 degrees Fahrenheit.
  8. Butter pie plate. Pour 1/2 cup of the reduced chair syrup into pan.
  9. Place pear half in center, cut side up, and arrange remaining pear quarters around the outside edge with the skinny part pointing toward center.
  10. Drape puff pastry over pie pan and tuck the edges under the pears.
  11. Baked for about 25 to 30 minutes or until puff pastry is golden brown.
  12. Remove from oven and allow to cool for about 30 minutes.
  13. Invert tart onto serving dish or into another pie pan.


Thursday, July 30, 2020

Lime and Coconut Avocado Tart


This is a sponsored post by Challenge butter, but the text and opinions are all mine. Thank you for supporting brands that make Kylee's Kitchen possible!

One of the best things about avocados is they take on whatever flavors your pair with them, and they add a lot of creaminess to the dish while doing so.

So when I had the idea to make a lime and coconut tart with avocados, my husband was a little skeptical, but after trying it, he said it tasted like a very creamy key lime pie.

A couple of notes about this recipe.
  1. The proportions in this recipe work best for one 9-inch springform pan. You’ll notice in the pictures I used a long tart pan, but that’s just because I wanted to try something new. If you make the recipe as is, it’s enough for about 1.5 long tart pans.
  2. You can use frozen avocados, but make sure you unthaw them first. I used 3 avocados which weighed about 275 grams. It’s best to go by weight as opposed to number of avocados.
  3. I haven’t had issues with the tart turning brown due to the avocados oxidizing, but make sure to wrap it tightly in plastic wrap. Fortunately, the lime juice also helps to stop it from turning brown.
  4. Make sure you use coconut cream and not coconut milk. Coconut milk is a lot thiner than the cream and can prevent your filling from setting.
  5. You can make this recipe by gluten-free by using gluten-free graham crackers.
I used Challenge cream cheese and butter for this recipe. Challenge products are my favorite because they use fresh milk and cream from local dairies, and they're put in the dairy case in just 24 hours, as opposed to 5-7 days, which is the case for most other brands.


Lime and Coconut Avocado Tart
Ingredients for the crust
  • 1/2 cup (50 grams) coconut flakes
  • 1 cup (100 grams) graham cracker crumbs
  • 1/4 cup (50 grams) granulated sugar
  • 6 Tablespoons unsalted Challenge butter, melted
Ingredients for the filling
  • 3/4 cup (150 grams) sugar
  • Zest of 2 limes ( about 4 teaspoons)
  • 12 ounces Challenge cream cheese, at room temperature
  • 3 avocados (about 275 grams), peeled and pitted
  • Juice of 2 limes (about 4 Tablespoons)
  • 6 ounces coconut cream
Directions for the crust
  1. Spray 9-inch springform pan with cooking spray and set aside.
  2. Toast coconut in frying pan (don’t add oil!) on low heat, stirring frequently until it starts to turn golden brown, or about 5 minutes.
  3. Remove from heat and set aside.
  4. Add graham crackers, toasted coconut flakes, and sugar to food processor. Pulse to fine crumbs. 
  5. Drizzle in butter and pulse until crumbs are coated and moist. 
  6. Press crumb mixture into bottom of pan. 
  7. Refrigerate while you make filling.
Directions for the filling
  1. Place sugar and lime zest in food processor and pulse.
  2. Add cream cheese and process until smooth.
  3. Add avocados and lime juice and process until smooth.
  4. Add coconut cream and process until smooth.
  5. Pour filling over crust and smooth top.
  6. Spray piece of plastic wrap with nonstick cooking spray and gently place it on top of filling.
  7. Refrigerate until set, or about 6 hours.
  8. Remove plastic wrap and garnish with more toasted coconut, limes, and whipped cream if desired.


Pin It button on image hover