Thursday, July 28, 2022

Extend the life of your tomatoes with these recipes


If you have a garden in Indiana, chances are you have tomato plants. And we are fast approaching the most magical time of the year when tomatoes come in… and they don’t stop. So for about a month we’re swimming in tomatoes, and then nothing. That’s why I wanted to share a few recipes that will help you enjoy your tomatoes for a longer time.

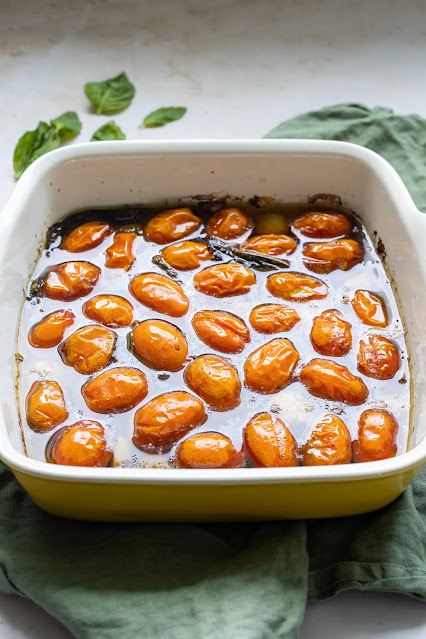
The first recipe I want to discuss is tomato confit. Confit (pronounced con-fee) is a preservation method in which food is slowly cooked in fat. It isn’t like a little drizzle of fat. Confit is like a fat bath.

For meat (like traditional duck confit), the item is usually cooked in its own fat. But for foods like tomatoes and garlic, the food is slow-cooked in olive oil and then stored in jars in the oil it was cooked in. The fat makes it hard for bacteria to grow and it reduces oxidation, thus extending the time before it spoils.

Tomatoes cooked in this method will keep their shape and their natural, fresh flavor.

You can store tomato confit in the refrigerator in glass jars (making sure the tomatoes are fully covered in oil) for a month. You can also freeze tomato confit in freezer-safe jars for up to 3 months.

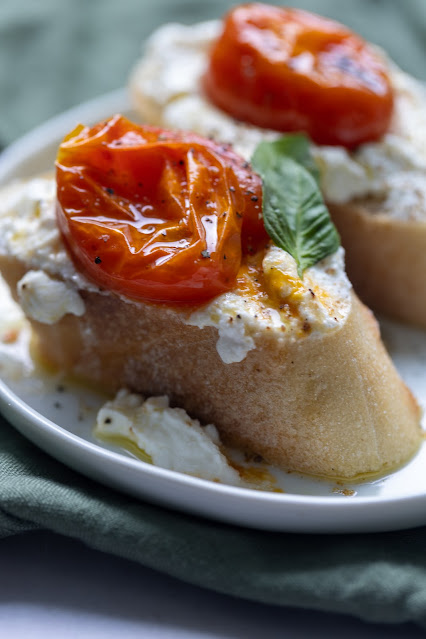
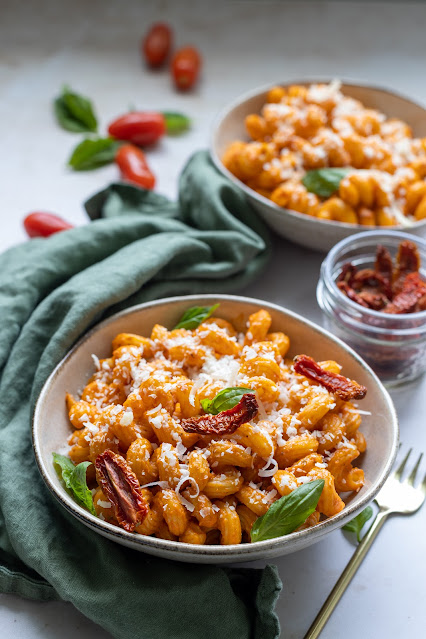
You can use tomato confit as a sauce with pasta or spooned over meat or seafood. Or you can even use it as a condiment on a sandwich or on good quality bread with a little ricotta spread.

After you eat all the tomatoes, use the olive oil for dressings, as a dip with bread, or just about anything else you can think of.


Tomato confit

Ingredients

  • 1 pound tomatoes
  • 10 sprigs fresh herbs (thyme, basil, and rosemary are my favorites)
  • 6 garlic cloves
  • 1 Tablespoon balsamic vinegar
  • 1/2 teaspoon kosher salt
  • 1/4 teaspoon black pepper
  • 1 cup extra virgin olive oil, plus more if needed

Directions

  1. Preheat oven to 250 degrees Fahrenheit.
  2. Place tomatoes in single layer in baking dish. Arrange herbs and garlic around tomatoes.
  3. Add balsamic vinegar and season with salt and pepper.
  4. Pour olive oil into dish until tomatoes are halfway submerged. Add more olive oil if necessary.
  5. Bake for 2 hours, or until tomatoes are soft but they haven’t burst.
  6. Transfer to jars with cooking oil. Make sure tomatoes are submerged in oil before closing lid.
  7. Cool to room temperature and store in refrigerator for up to a month.

Not all pickling involves cucumbers. You can pickle just about anything! It’s more of a process than a recipe, and it involves soaking vegetables in a brine that’s usually equal parts vinegar and water. 

So why pickle tomatoes? The acid in the brine solution slows the growth of harmful bacteria and preserves tomatoes past their normal expiration. Pickling also gives the tomatoes a delicious tangy, salty flavor that makes them a unique ingredient to use in a wide variety of dishes.

The recipe I’m sharing is a “quick pickle” recipe, meaning there’s no canning required. It also means you must store them in the refrigerator and eat them within a month.

Pickled Tomatoes

Ingredients

  • 8 ounces cherry tomatoes
  • 2 cloves garlic, sliced
  • 4 sprigs fresh herbs (thyme, basil, and dill are great choices)
  • 1 teaspoon coriander seeds
  • 1 cup apple cider vinegar 
  • 1 cup water
  • 1 Tablespoon kosher salt
  • 1 Tablespoon granulated sugar 

Directions

  1. Use skewer to poke hole through each tomato.
  2. Place garlic, herbs, and coriander seeds in pint jar.
  3. Pack tomatoes into jar.
  4. Combine vinegar, water, salt, and sugar in small saucepan. Bring to boil and stir to dissolve salt and sugar.
  5. Pour brine over tomatoes, leaving 1/2 inch at top. 
  6. Tap jar a few times to remove air bubbles. Top off jar with more brine if necessary.
  7. Screw on lid and cool to room temperature before storing in refrigerator for up to 4 weeks.
  8. Wait at least 48 hours before eating.

Sun-dried tomatoes are tomatoes minus the water. As a result, the flavor is very intense and concentrated. I use sun-dried tomatoes in a wide variety of dishes. They’re great in salads, in pastas, in pesto, in omelets… 

Here’s a secret you probably already guessed—sun-dried tomatoes aren’t always dried in the sun. You can make sun-dried tomatoes at home in your oven. Cut smaller tomatoes in half and larger tomatoes in quarters. Any type of tomato works well. Just make sure the cut pieces are uniform so they dry at the same rate. Other than tomatoes, the only other ingredient you need to make these is salt. Sprinkling a little salt on top will help the tomatoes release moisture. You can also add dried herbs and seasonings for additional flavor.

Store the tomatoes for several months in the refrigerator or up to a year in the freezer. Just don’t place them in the crisper drawer because they need to remain moisture free.


Sun-dried tomatoes

Ingredients 

  • 8 ounces tomatoes, cut in half or quartered depending on size, pulp removed from larger varieties
  • 1/2 teaspoon kosher salt

Directions

  1. Preheat oven to 225 degrees Fahrenheit and line baking sheet with parchment paper. 
  2. Place tomatoes cut-side up on baking sheet, sprinkle with salt and bake for 3 hours. 
  3. Flip tomatoes and smash to remove an excess moisture.
  4. Return to oven for an hour or until tomatoes are very dry but still pliable.
  5. Store in air-tight bag in refrigerator for several months or in freezer for up to a year.


Monday, July 25, 2022

Roasted Lemon Vanilla Glazed Carrots


This is a sponsored post by Challenge butter, but the text and opinions are all mine. Thank you for supporting brands that make Kylee's Kitchen possible!

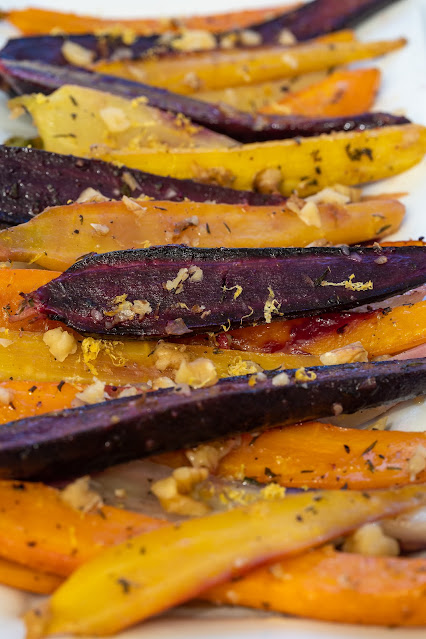
I love making roasted vegetables for an easy side dish. Root vegetables like carrots are particularly great for roasting because their sweetness develops and becomes more pronounced as they cook. My favorite carrots to roast are Les Petites Carrots of Many Colors from Trader Joe's. I love the different colors and they're already the perfect size.


Challenge Butter recently released a variety of snack spreads, including Challenge Vanilla Fudge Snack Spread. I know a lot of people add brown sugar and maple syrup to their carrots, so I thought it would be tasty to add a little sweetness in the form of this snack spread. I balanced the sweetness with lemon zest, and they were both delicious and beautiful!


Roasted Lemon Vanilla Glazed Carrots

Yield: About 4 servings

Time: About 30 minutes

Ingredients

  • 1 - 1.5 pounds carrots, cut in half lengthwise
  • 2 Tablespoons avocado oil
  • 1 Tablespoon fresh thyme leaves, minced
  • 1/4 teaspoon kosher salt
  • 1/4 teaspoon black pepper
  • 2 Tablespoons Challenge Vanilla Fudge Snack Spread
  • 1 lemon, zested

Directions

  1. Preheat oven to 400 degrees Fahrenheit. Line baking sheet with foil and set aside.
  2. Place carrots in bowl with oil, herbs, salt, and pepper and stir to combine.
  3. Spread carrots in even layer on baking sheet, cover with foil, and place in oven for 20 minutes. 
  4. Make sure carrots are tender. If not, return to oven for 5 more minutes or until tender.
  5. Place carrots in large bowl with Challenge Vanilla Fudge Snack Spread and lemon zest. Stir gently. 
  6. Adjust salt and pepper if necessary.

Wednesday, July 13, 2022

Easiest baked macaroni and cheese


This is a sponsored post by Challenge butter, but the text and opinions are all mine. Thank you for supporting brands that make Kylee's Kitchen possible!

I realize the “best” macaroni and cheese is very subjective because many people have differing opinions when it comes to consistency, flavors, cooking method, etc. But most people get excited about any version of homemade macaroni and cheese. And I think this version is absolutely delicious. 

This recipe is extra special because you don't have to boil the pasta ahead of time! This may seem like a simple step and not much of a shortcut, but as a new mom I know any amount of time-saver, whether it be for cooking time or dishwashing time, is a big deal!

I realize this isn't the correct culinary method for cooking macaroni and cheese, and I'm mildly concerned my chefs at school will be ashamed. But as of lately, easy recipes are the best recipes, and what's most important is that this recipe is downright delicious!

What is the best type of pasta for macaroni and cheese?

Most people just use elbow macaroni pasta because “macaroni” is right in the name. But actually, pasta with ridges is far better because the sauce clings to the ridges. That’s why the best pasta to use is cavatappi. Its corkscrew shape means lots of areas for sauce to cling onto.

What cheeses are best?

Young, moist cheeses melt better than older, drier ones. So avoid cheeses like parmesan and manchego (although they could make for a good crunchy topping). I like to stick with sharp cheddar for taste, smoked gouda for complexity, and American cheese. Why use processed American cheese? Because it contains stabilizers that will prevent your cheese sauce from breaking and turning grainy. Velveeta does the same thing. I also used cream cheese in the sauce to make it extra creamy. I used Challenge cream cheese for this recipe because the taste and texture is far superior to anything else I've found on the market. That's because it's made with real milk, cream, and other natural ingredients.

Why grate your own cheese?

Yes, it is a pain, but it makes a huge difference! That’s because pre-shredded cheese is coated in additives that prevent it from clumping. But those same additives also prevent it from melting well.

What type of milk?

You want milk high in fat for an extra creamy macaroni and cheese. Some people use heavy cream or half and half, but I find it can make the dish greasy. Instead, I used evaporated milk. Evaporated milk has more protein than regular milk, but less fat than heavy cream, resulting in a creamy filling without it being too greasy.

What should you use as a topping?

I like to use extra cheese or panko because it’s light and airy, but you could use cracker crumbs, breadcrumbs, fried onions, etc. Or you could forego a crunch topping.

Easiest baked macaroni and cheese

Yield: About 6 servings

Ingredients

  • 2 tablespoons Challenge unsalted butter
  • 3 cups evaporated milk
  • 8 ounces Challenge cream cheese, room temperature
  • 2 teaspoons dry mustard
  • 2 teaspoons garlic powder
  • 1 teaspoon Worcestershire sauce
  • 1/2 teaspoon ground cayenne
  • 1/2 teaspoon smoked paprika
  • 1/4 teaspoon black pepper
  • 12 ounces extra-sharp cheddar cheese, grated (set aside 4 ounces for topping)
  • 8 ounces smoked gouda cheese, grated (set aside 4 ounces for topping)
  • 6 ounces American cheese, cubed
  • 1/2 pound cavatappi pasta, uncooked

Directions

  1. Preheat oven to 350 degrees Fahrenheit and grease 7x11-inch square baking dish with butter. Set aside.
  2. Blend evaporated milk, cream cheese, dry mustard, garlic powder, Worcestershire sauce, ground cayenne, smoked paprika, and black pepper. 
  3. Mix in 8 ounces extra-sharp cheddar cheese, American cheese, smoked gouda cheese, and uncooked pasta.
  4. Pour into prepared pan, cover with foil, and bake for 30 minutes.
  5. Uncover pan, stir, sprinkle reserved cheese on top, and bake an additional 20-25 minutes, or until the top is lightly browned. 
  6. Let cool for 10 minutes and serve. The consistency sets up like a custard.

Pin It button on image hover