This is a sponsored post by Challenge butter, but the text and opinions are all mine. Thank you for supporting brands that make Kylee's Kitchen possible!
There are few things more enjoyable than fresh-baked pie with ripe summer produce. But pies can be fickle and time-consuming. Fortunately, we live in a world where galettes exist.
A galette is pie’s more easygoing cousin. No pie plate. No crimping. No fuss. If it looks imperfect, then you did it correctly. It is supposed to be rustic. And that’s why it’s the perfect base for summer fruit.
You can make pie dough for a galette, or you can use store-bought pie dough, puff pastry, phyllo dough… it’s kind of like a “choose your own adventure” book.
Some important tips to remember when making a galette…
If you’re making your own pie crust, you need to make a mealy pie crust. This means the butter pieces in the dough are the size of peas. Mealy pie dough is best for fruit pies because it is good at repelling moisture from liquid fillings.
To prevent a soggy bottom, I recommend adding a little cornstarch to your fruit filling; macerating the fruit and then draining the juices; and creating a barrier between the dough and the filling. The barrier can be anything your heart desires—almond paste, fruit preserves, cookie crumbs, etc. I use goat cheese as the barrier in this recipe.
Another important tip: roll the galette dough out to 1/8-inch thick. If it’s too thick, the crust will be gummy and chewy, not flaky.

It’s important to use good quality butter in your recipe because it makes a tremendous difference in your final product. I use
Challenge European Style Butter when I make pie dough. It’s churned slower and longer, in the tradition of fine European butters, to produce a more flavorful butter with less moisture and higher butterfat.
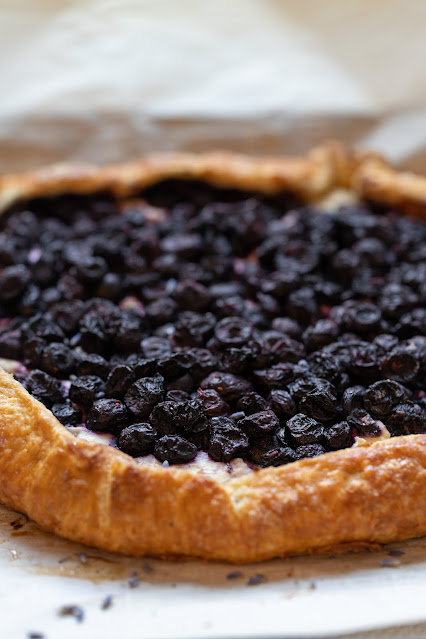
Blueberry lavender galette
Yield: About 6 servings
Ingredients
For the dough
- 113 grams (8 tablespoons or 1 stick) unsalted butter
- 150 grams (1 1/4) cups all-purpose flour
- 13 grams (1 Tablespoon) granulated sugar
- 1 gram (1/4 teaspoon) kosher salt
- 60 grams (1/4 cup ice water)
For the filling
- 4 cups blueberries
- 50 grams (1/4 cup) granulated sugar
- 16 grams (2 Tablespoons) cornstarch
- Zest from 1 lemon (about 1 Tablespoon)
- 6 grams (about 1 Tablespoon) dried lavender, ground (with mortar and pestle or spice grinder)
- 5 grams (1 teaspoon) vanilla extract
- 1.5 grams (1/4 teaspoon) kosher salt
- 6 ounces goat cheese, room temperature
- Egg wash (1 egg mixed with 1 Tablespoon water)
- Optional: Turbinado sugar
Directions
For the dough
- Cut butter into 1/2-inch cubes. Place in freezer for at least 20 minutes or until very cold.
- In large bowl, combine flour, sugar, and salt.
- Cut butter into flour mixture with pastry blender or food processor until butter is pea-sized.
- Make well in flour mixture and add water.
- Mix to create shaggy mixture then knead to form dough. If dough is too dry, add up to 2 Tablespoons additional ice water.
- Form dough into flat disc and wrap. Refrigerate for at least 30 minutes or up to 2 days.
- Once dough is chilled, preheat oven to 425 degrees Fahrenheit.
- Roll dough out on floured surface to 1/8-inch thick. Transfer pie dough to baking sheet.
For the filling
- Mix together blueberries, sugar, cornstarch, lemon zest, lavender, vanilla extract, and salt. Set aside.
- Spread goat cheese over galette, leaving 3-inch border.
- Drain any excess juices released by blueberries and spread mixture evenly over goat cheese.
- Fold the edge of the pie dough up and over blueberry filling, pleating every 3 inches.
- Brush galette crust with egg wash and sprinkle turbinado sugar on top.
- Bake for about 35-40 minutes, or until crust is golden brown.
- Cool for 10 minutes before slicing.
.png)


