Showing posts with label Chocolate. Show all posts

Thursday, September 11, 2025

Tips for the perfect chocolate milkshake (plus a fall twist)!

There’s nothing quite like a chocolate milkshake. Thick, creamy, cold, and deeply chocolatey—it’s comfort in a glass. And while it might seem like the kind of treat you only get at your favorite ice cream shop, the truth is, a truly great milkshake is easy to make at home if you keep a few fundamentals in mind.

Milkshake Basics

  • Chilled glasses: Place your serving glasses in the freezer before youn do anything else. It’s a small step, but it makes a huge difference in keeping that shake frosty and indulgent.

  • Ice cream consistency: Let your ice cream soften for 5 to 10 minutes before blending. Too cold, and your blender will struggle. Too melted, and you’ll lose that thick body. The ice cream should be scoopable but still firm.
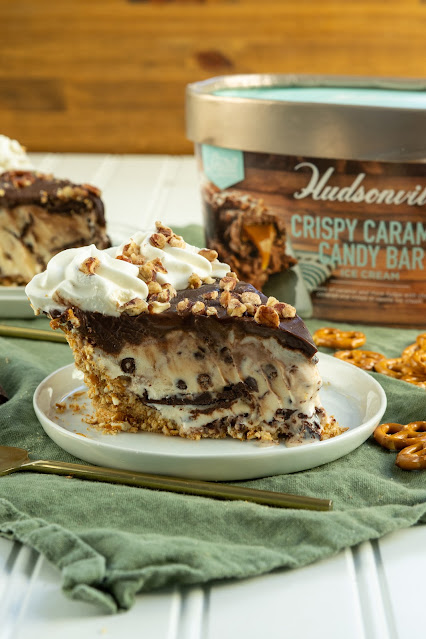
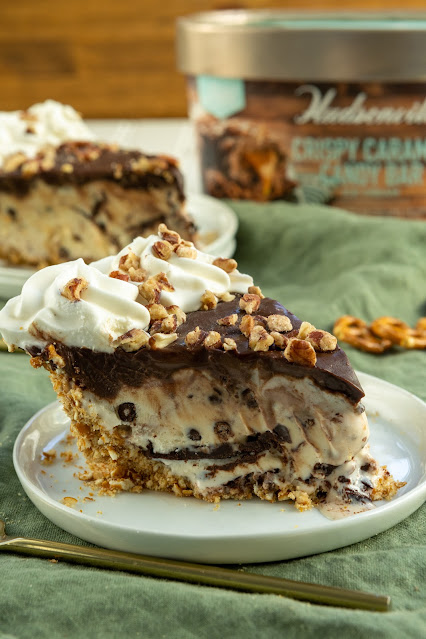
  • High-quality ice cream: Ice cream is the backbone of a milkshake, so it’s important to use the best quality you can find. Premium ice cream is churned with less air, made with richer dairy, and flavored more intensely, which translates to a shake that’s creamier, and the flavor won't be diluted by milk. That's why I always choose Hudsonville Ice Cream for making milkshakes.

  • Ratio of ice cream to milk: I think a perfect balance is 3 parts ice cream to 1 part milk. I prefer to sip my milkshake through a straw. Add more ice cream if you want a spoon-thick milkshake.

  • Malted milk powder: This ingredient, which is made from malted barley, wheat flour, and evaporated milk, is the key to old-school soda fountain flavor. It adds a warm, slightly toasty sweetness that deepens the chocolate flavor. 

  • Best way to mix: A high-powered blender gives the smoothest results. For single servings, an immersion blender in a tall cup works beautifully. Start on the lowest speed and work up to medium speed. Blend just until the milkshake is pourable.

  • Layering ingredients in the blender: Start with milk and any liquid or powdered mix-ins (pumpkin purée, malted milk powder, etc.) on the bottom, then add the ice cream on top. This helps everything blend evenly, prevents powders from clumping, and saves your blender from overworking.

But make it seasonal: Chocolate milkshakes for fall

Once you’ve got the basics down, it’s fun to play with flavor. I love to use warm spices and cozy flavors this time of year. Maple syrup, caramel, apple, cinnamon, and even crushed gingersnaps make great add-ins. But my favorite twist this year is a  Spicy Chocolate Pumpkin Milkshake.

This shake is everything we love about fall wrapped into one frosty glass: Hudsonville’s Classic Chocolate Ice Cream as the base, real pumpkin purée for a seasonal note, pumpkin pie spice, and just a touch of cayenne for warmth.

Why cayenne and pumpkin work so well

Chocolate and chili are a classic duo dating back to ancient Aztec and Mayan drinking chocolate. The warmth of cayenne doesn’t make the shake “spicy” in the hot-sauce sense—it adds a gentle heat that enhances the richness of chocolate. When paired with pumpkin and cozy fall spices, that little kick creates balance: sweet, creamy, spicy, and warm all at once. 


Spicy Chocolate Pumpkin Milkshake

Yield: 2 servings

Time: About 5 minutes

Ingredients

    • 1 cup whole milk 
    • 1/3 cup pumpkin purée 
    • 2 Tablespoons malted milk powder
    • 1 1/2 teaspoons pumpkin pie spice
    • 1/8 teaspoon cayenne pepper 
    • 3 cups Hudsonville Classic Chocolate ice cream
    • Optional toppings: whipped cream, crushed gingersnaps

    Directions

    1. Stick glasses in freezer.
    2. Add milk, pumpkin purée, malted milk powder, pumpkin pie spice, and cayenne to the bottom of your blender.
    3. Top with Hudsonville Classic Chocolate ice cream.
    4. Blend until smooth and creamy, stopping to scrape down the sides if needed.
    5. Taste and adjust: add more milk if you want it thinner, or another pinch of cayenne if you want more heat.
    6. Pour into chilled glasses.
    7. Top with whipped cream and crushed gingersnaps Serve immediately with a straw.


    Thursday, August 8, 2024

    Triple Chocolate No-Bake Cheesecake

    This is a sponsored post by Challenge Butter, but the text and opinions are all mine. Thank you for supporting brands that make Kylee's Kitchen possible! 

    Cheesecake isn't a complicated dessert, but sometimes it's just a little more effort than I care to make.

    No-bake cheesecake has entered the chat.

    So what's the difference between standard cheesecake and no-bake cheesecake? 

    Regular cheesecake is firm and can be quite dense. It's a custard that uses eggs to help set it when it's baked in the oven. No-bake cheesecake is more of a mousse with a lighter, almost whipped texture. There are no eggs, so it uses other means to help set it, like gelatin or whipped cream.

    Another bonus: Because we're not baking the cheesecake, it's pretty much foolproof. We don't have to worry about a water bath or over-baking it or under-baking it or it cracking in the middle.

    This particular cheesecake recipe is for ultimate chocolate fans. It starts with a chocolate Oreo crust; the filling includes both black cocoa powder and melted dark chocolate; and I top it all off with a dark chocolate ganache.


    Let's talk about the crust...

    There are two ingredients: regular Oreos and butter. The Oreo filling plus the butter allow for the crust to stick together without baking. If you use cookies without cream filling, you will have to increase the amount of butter in the recipe. The texture should be comparable to wet sand and stick together in your hands. I use Challenge Unsalted Butter in my crust recipe. Using high-quality butter, like Challenge, has a big impact on the crust flavor. 

    Now for the filling...

    The first thing we want to do is make the cream cheese ultra smooth. The best way to do this is to beat it with granulated sugar. The granules in the sugar break down the cream cheese. 

    Then we add the next three ingredients: sour cream, back cocoa powder, and vanilla bean paste. Sour cream contributes to tanginess; black cocoa powder adds extra depth to the chocolate flavor, but you can omit or substitute with Dutch-processed cocoa powder; and vanilla extract balances the flavors.

    The dark chocolate is next. You want to heat it in short increments to prevent it from burning. If it's really hot, let it cool off for a few minutes before adding it to the filling. Don't let it cool to room temperature though because then it may harden once it's mixed with the other ingredients.

    The last ingredient is heavy cream. Some recipes will advise you to whip the heavy cream first and then fold it into the filling, but in my experience, that isn't necessary. Save yourself from cleaning an extra bowl and add it straight to the mixer.

    Last is the topping...

    I went all in on chocolate and topped the cheesecake with a chocolate ganache. The recipe is as simple as chopping chocolate, pouring heated cream over the chocolate, letting the mixture sit for 5 minutes, and stirring it.


    The hardest part of the recipe...

    Waiting for the cheesecake to set up is without a doubt the hardest part of the recipe! It would probably be ready to slice into after four hours, but I prefer to wait six hours to be extra sure.

    When you cut into it, I recommend running your knife under hot water and wiping the knife clean after every cut to ensure clean slices.


    Triple Chocolate No-Bake Cheesecake

    Yield: About 12 servings (9-inch cheesecake)

    Prep time: About 30 minutes

    Chill time: At least 4 hours

    Ingredients

    For the crust

    For the cheesecake filling

    • 24 ounces (681 grams) cream cheese, full fat
    • 1 cup (200 grams) granulated sugar
    • 1/2 cup (120 grams) sour cream, full fat
    • 2 Tablespoons (10 grams) black cocoa powder
    • 2 teaspoons vanilla extract
    • 10 ounces (300 grams) dark chocolate, chopped (preferably around 60% cacao)
    • 1/2 cup (120 milliliters) heavy cream

    For the ganache topping

    • 4 ounces (114 grams) dark chocolate, chopped (preferably around 60% cacao)
    • 4 ounces (120 milliliters) heavy cream

    Directions

    For the crust

    1. Line bottom of 9-inch springform pan with parchment paper. Set aside.
    2. Add Oreos to food processor and pulse until cookies are fine crumbs.
    3. Melt butter in microwave and add to food processor. Pulse until mixture resembles wet sand.
    4. Press crust mixture evenly into bottom and 1 inch up sides of springform pan.
    5. Use bottom of cup to smooth and pack down crust into even layer.
    6. Place crust in freezer while preparing filling.

    For the cheesecake filling

    1. In large bowl with mixer, beat cream cheese and sugar on medium speed until smooth and creamy, about 2-3 minutes.
    2. Add sour cream, black cocoa powder, and vanilla extract. Beat another 2-3 minutes on medium-high speed until smooth. Set aside.
    3. Add chocolate to heatproof bowl and microwave 1 minute. Stir chocolate and return to microwave for 30 seconds. Stir again. If chocolate is mostly melted, set aside for several minutes to cool. If not, repeat process until chocolate is smooth.
    4. Pour chocolate into mixing bowl and beat on medium-high speed until filling is light and fluffy, about 1-2 minutes.
    5. Add heavy cream to bowl and beat on low speed until filling is well mixed, about 1 minute.
    6. Pour filling into crust and smooth into even layer.
    7. Cover cheesecake with plastic wrap or aluminum foil and refrigerate at least 4 hours but preferably overnight.

    For tha ganache

    1. Place chocolate in heatproof bowl.
    2. Heat cream in microwave in 30-second intervals until it starts to steam and you see a few bubbles around the edge.
    3. Pour cream over chocolate and let sit 5-10 minutes. 
    4. Stir cream and chocolate together until smooth.
    5. Starting in center, pour ganache over cheesecake and use spatula to carefully spread ganache over cheesecake.
    6. Place cheesecake back in refrigerator for at least 10 minutes to allow ganache to set.
    7. When ready to serve, run knife under really hot water and dry before slicing. Repeat the process with every slice.
    8. Cover and store leftover cheesecake in refrigerator for up to 4 days.


    Monday, April 3, 2023

    Strawberry cheesecake-filled bunnies


    I filled hollow chocolate bunnies with delicious strawberry cheesecake. I used both fresh and freeze-dried strawberries for maximum flavor. Everything goes in the blender which makes it super easy. You can fill the bunnies by cutting off the ears or by making a small hole on its underside. I like cutting the ears so guests can see the filling. 

    Strawberry cheesecake-filled bunnies

    Yield: Makes enough filling for 7 (3.5 ounce) chocolate bunnies

    Time: 10 minutes active, 3 hours waiting

    Ingredients

    • Hollow chocolate bunnies
    • 0.5 pounds strawberries, hulled
    • 60 grams (1/2 cup) confectioners' sugar
    • 0.5 ounces freeze-dried strawberries
    • 4 ounces cream cheese, softened
    • 4 ounces coconut cream
    • 4 ounces sour cream
    • 3.5 grams (1/2 packet) unflavored gelatin
    • 2 Tablespoons cold water

    Directions

    1. Heat sharp paring knife under warm water. Cut off bunnies' ears as close to top as possible.
    2. Add strawberries to blender and puree until smooth. Pour puree into another bowl and set aside.
    3. Blend confectioners' sugar and freeze-dried strawberries. Add cream cheese and blend until smooth, scraping sides as needed.
    4. Add coconut cream and blend several minutes on high speed until fluffy. Reduce speed to low and add sour cream. Return strawberry puree to blender and mix just until combined.
    5. Sprinkle gelatin over water and bloom for 5 minutes, or until gelatin has absorbed all water.
    6. Microwave gelatin for 30 seconds, stirring every 10 seconds. It should look like clear liquid. Slowly add into blender mixture on low speed.
    7. Use funnel to pour cheesecake mixture into cavity of hollow chocolate bunnies.
    8. Transfer bunnies to refrigerator in upright position. Allow cheesecake mixture to set for several hours before serving.


    Wednesday, September 28, 2022

    Chai-spiced coffee truffles


    Chocolate truffles are one of the easiest desserts you can make. In its most basic form, it’s just chocolate and cream, which is called a ganache. Since there are so few ingredients, you want to make sure the chocolate flavor really stands out. There are two good ways to do that.


    The first way is to use good quality chocolate. You should want to eat the chocolate on its own. Around 60% cacao dark chocolate is my favorite chocolate to use.

    The second way is to incorporate coffee into the recipe. Coffee enhances and intensifies the flavor of chocolate without the lingering taste of coffee. Both chocolate and coffee are inherently bitter. So when you add a small amount of coffee to chocolate the bitterness of the coffee under its the bitterness of the chocolate and makes it taste more chocolatey.


    There are a couple different ways to impart coffee flavor in baked goods. My favorite way to do so when making truffles is to steep the cream with your favorite coffee beans. By using beans instead of generic espresso powder you can customize the flavor more. The beans I used from Helm Coffee Roasters in Indianapolis have flavor notes of chocolate and caramel. 

    Helm is Indy's newest coffee roaster, and I can't recommend them enough. Owners Jill and Carol are working hard to build a community, and they host a new parent support group every Tuesday at 10:30 a.m. that I've found to be really helpful as I navigate motherhood for the first time.


    I tested this recipe with and without the coffee beans and there is a significant difference in flavor. The truffles tasted a little flat without the coffee. If you are worried about the caffeine content, you can use decaf coffee beans.

    Chai-spiced coffee truffles

    Yield: Makes about 30 truffles

    Time: About 1 hour

    Ingredients

    • 1 Tablespoon ground ginger
    • 2 teaspoons ground cinnamon
    • 2 teaspoons ground cardamom
    • 1 teaspoon ground allspice
    • 1 teaspoon ground cloves
    • 1/2 teaspoon ground black pepper
    • 180 milliliters (3/4 cup) heavy cream
    • 1/2 cup coffee beans
    • 360 grams dark chocolate (around 60% cacao), chopped fine
    • 1 Tablespoon dutch-processed cocoa powder

    Directions

    1. Combine ginger, cinnamon, cardamom, allspice, cloves, and black pepper in bowl. Set aside 1 Tablespoon.
    2. Pour heavy cream in small saucepan with spice mixture and coffee beans. Heat on low-medium until it simmers.
    3. Remove from heat, place lid over saucepan, and steep for at least 30 minutes and up to overnight in the refrigerator.
    4. Strain cream to remove coffee beans and return to simmer. Pour over chopped chocolate. Let sit for 3 minutes and stir until chocolate is melted and mixture is smooth.
    5. Let ganache cool until it's solid—about 1 hour in refrigerator.
    6. Combine leftover spice mixture with cocoa powder.
    7. Scoop teaspoon-sized balls of ganache and roll in cocoa powder-spice mixture.
    8. Store truffles in refrigerator.

    Thursday, February 10, 2022

    Turtle Ice Cream Pie

    This is a sponsored post by Hudsonville Ice Cream, but the text and opinions are all mine. Thank you for supporting brands that make Kylee's Kitchen possible!

    I’ve always loved the classic combination of caramel, chocolate, and pecan flavors in turtle candies. So I created an easy, no-bake turtle ice cream pie recipe that combines all those flavors into a much larger dessert. It’s sweet, it’s salty, it’s creamy, and it’s crunchy. The base is a pretzel pie crust; the filling is Hudsonville’s Limited Edition Crispy Caramel Candy Bar ice cream; and the topping is a rich, chocolate ganache. Of course, I decorated the pie with whipped cream and pecans.

    You’re probably familiar with graham cracker pie crusts and cookie crumb pie crusts, but you may have never heard of a pretzel pie crust. It’s the same concept as the other two crumb crusts but with pretzels! I pulverized whole pretzels to create crumbs in a food processor and then mixed the crumbs with melted butter and brown sugar. If you don’t have access to a food processor, you can certainly put the pretzels in a zip-top bag and crush them with a rolling pin. You want the crumbs to be pretty small so the crust holds together well. It should feel like wet sand, and you should be able to pinch it together. If it’s too dry, add another tablespoon of melted butter and test it again. 

    The pie filling is Hudsonville’s Limited Edition Crispy Caramel Candy Bar ice cream. The vanilla ice cream base is loaded with ribbons of caramel and thick fudge ribbons with chocolate-covered rice crisps. It’s a Limited Edition flavor, so you’ll want to grab it before it’s gone for the season. I recommend softening the ice cream by moving it to the refrigerator about 20-30 minutes before filling your pie shell. I used half a carton for my 9-inch pie plate, but the amount you use may vary depending on the size of your dish. After filling your pie with ice cream, make sure you put it back in the freezer.

    The chocolate ganache is like a hot fudge sauce, but it’s 10 times better. And it’s incredibly easy to make! Just heat the heavy cream in the microwave (or on the stove) until it steams. For me, this was about 90 seconds in the microwave. Then pour the heavy cream over your chocolate and let it sit for 2 to 3 minutes. The chocolate will soften and melt. Slowly stir the mixture until it’s combined, and then add the corn syrup, vanilla, and salt. Why corn syrup? It makes the ganache shiny! Once the ganache is cool to touch, remove the pie from the freezer and pour the ganache over the ice cream. Then place the pie right back in the freezer. 

    The hardest part of this entire recipe is waiting for the pie to set up. I had to wait 4 hours until my pie was firm enough to cut. 

    Once it’s ready, decorate it with whipped cream and toasted pecan pieces. I always prefer homemade whipped cream because I think it tastes infinitely better than canned.

    The contrast of a crunchy, salty pretzel crust with ultra creamy Limited Edition Crispy Caramel Candy Bar ice cream and rich, smooth chocolate ganache makes for the perfect combination of flavors and textures. Check out this Scoop Locator tool to find Hudsonville’s Limited Edition Crispy Caramel Candy Bar ice cream at a store near you!


    Turtle Ice Cream Pie

    Yield: 12 servings

    Ingredients

    For the crust

    • 1 1/2 cups (180 grams) pretzels
    • 8 Tablespoons (113 grams) unsalted butter, melted
    • 3 Tablespoons (40 grams) brown sugar)

    For the filling

    For the ganache

    • 3/4 cup heavy cream
    • 8 ounces dark chocolate, chopped
    • 1 Tablespoon corn syrup
    • 2 teaspoons vanilla extract
    • 1/8 teaspoon salt

    For the whipped cream

    • 1 cup heavy cream
    • 1/4 cup (30 grams) powdered sugar
    • 1 teaspoon vanilla extract

    Topping

    • 1/4 cup (33 grams) toasted pecans, chopped

    Directions

    For the crust

    1. Combine pretzels, butter, and brown sugar in food processor.
    2. Pulverize until mixture resembles wet sand. Add 1 Tablespoon additional butter if mixture is too dry.
    3. Press mixture into bottom and up side of greased 9-inch pie dish.

    For the filling

    1. Spoon 1/2 carton Limited Edition Crispy Caramel Candy Bar ice cream into pie crust and smooth top.
    2. Place in freezer.

    For the ganache

    1. Heat heavy cream until it's steaming (in microwave or on stove).
    2. Pour over chocolate and let sit for 3 minutes.
    3. Stir until chocolate is melted and mixture is spoon.
    4. Stir in corn syrup, vanilla extract, and salt.
    5. Allow ganache to sit until it is no longer hot to touch.
    6. Remove pie from freezer and pour ganache over pie. Return pie to freezer.

    For the whipped cream

    1. Using wire whisk attachment on stand mixer or hand-held mixer, beat heavy cream, powdered sugar, and vanilla extract until stiff peaks form.
    2. Remove pie from freezer and either pipe or spread whipped cream on top of pie.
    3. Sprinkle pecan pieces on top and return pie to freezer.
    4. Allow pie to set up in freezer for at least 2 hours before serving.


    Monday, November 22, 2021

    No oven necessary for these 3 Thanksgiving desserts


    This is a sponsored post by Challenge butter, but the text and opinions are all mine. Thank you for supporting brands that make Kylee's Kitchen possible! 

    Today I’m sharing three dessert ideas that don't require use of an oven, so you don't have to worry about competing for oven space on Thanksgiving day! Two of the desserts are no-bake recipes, and the last dessert is made in a slow cooker. 


    Pumpkin tiramisu
    1. Traditional tiramisu custard is made with eggs, but the pumpkin puree in this desserts acts as a binder, which means no eggs necessary.
    2. Make sure to use crunchy ladyfingers when making tiramisu because sponge ladyfingers get too soggy. 
    3. If you don’t have access to an espresso machine (I certainly don’t) just buy instant espresso and mix a teaspoon with 1/2 cup boiling water. Traditionally, tiramisu also has a little alcohol mixed in with the espresso. You can use rum, brandy, cognac, any variety of liqueurs, or just omit it. 
    4. Another tip for avoiding soggy ladyfingers is to use a pastry brush to brush them with the espresso instead of dipping them in it.

    Pumpkin tiramisu

    Yield: 9 pieces

    Ingredients

    For the mousse

    • 1 1/4 cup (300 grams) pumpkin puree
    • 8 ounces mascarpone cheese
    • 1 cup (113 grams) powdered sugar
    • 2 teaspoons pumpkin pie spice
    • 2 teaspoons vanilla extract
    • 1/4 teaspoon salt
    • 1 1/2 cups (360 milliliters) heavy cream

    For espresso mixture

    • 3/4 cup boiling water
    • 1 Tablespoon (4 grams) espresso powder
    • 1 Tablespoon (15 milliliters) brandy, Bailey’s, rum, cognac, or hazelnut liqueur (optional)

    For assembly

    • 7 ounces Italian ladyfingers, crunchy

    Directions

    For the mousse

    1. In large bowl, beat together pumpkin puree on low speed with mascarpone, powdered sugar, pumpkin pie spice, vanilla extract and salt.
    2. Slowly pour in heavy cream while continuing to beat on low speed. Once heavy cream is incorporated, beat mixture at medium speed until soft peaks form.

    For espresso mixture

    1. Mix espresso powder with boiling water. Once cooled, stir in alcohol.

    For assembly

    1. Use pastry brush to brush ladyfingers with espresso mixture. Place in single layer at bottom of 9x9-inch baking dish.
    2. Scrape half of pumpkin mousse mixture on top of lady fingers.
    3. Use pastry brush to brush remaining ladyfingers with espresso mixture. Place in single layer on top of mousse. Scrape remaining mousse on top of lady fingers and smooth.
    4. Cover and refrigerate at least 6 hours but overnight is preferable.
    5. When ready to serve, garnish with pumpkin pie spice, if desired.


    Chocolate Grand Marnier pie
    1. The crumb crust is just Oreo crumbs and butter. I used 1/2 package of cookies to make a 9-inch pie crust. The crumb mixture should be the consistency of wet sand. Freeze the crust 15 minutes before pouring the filling in--no need to bake it.
    2. You can use dark, bittersweet, or milk chocolate depending on your taste preference. I actually found dark chocolate with orange flavoring at Trader Joe’s which worked perfectly for this recipe.
    3. Since this is a no-bake recipe, it’s very important to use high qualityChallenge salted butter ingredients. That’s why I only use Challenge dairy products. I used Challenge salted butter for the crumb crust and Challenge cream cheese for the filling. The salted butter perfectly balanced the sweetness of the Oreo cookie crumbs. And the silky cream cheese is made with real milk, cream, and natural ingredients for superior flavor and an ultra smooth finish. 


    Chocolate Grand Marnier Pie

    Yield: 8 servings

    Ingredients

    For the crumb crust

    For the filling

    • 8 ounces Challenge cream cheese
    • 1 cup (113 grams) powdered sugar
    • 1 Tablespoon Grand Marnier
    • 1 Tablespoon orange zest
    • 2 teaspoons vanilla extract
    • 1 teaspoon salt
    • 10 ounces bittersweet chocolate, melted
    • 2 cups (480 milliliters) heavy cream

    Directions

    For the crumb crust

    1. Mix crumbs with melted butter.
    2. Press evenly into bottom and up sides of 9-inch pie dish. Freeze for at least 15 minutes before adding filling.

    For the filling

    1. With whip attachment on mixer, beat cream cheese and powdered sugar until light and fluffy, about 3 minutes.
    2. Add Grand Marnier, orange zest, vanilla, and salt, and mix to combine.
    3. With mixer running, slowly add warm chocolate and whip on low speed until just combined.
    4. With mixer still running, add heavy cream in slow steady stream. 
    5. Once heavy cream is fully incorporated, whip on medium speed to medium stiff peaks. 
    6. Pour filling into pie crust and spread into even layer. Cover directly to surface with plastic wrap and refrigerate until set—at least 6 hours.
    7. Decorate with chocolate curls and/or candied orange peels when ready to serve.


    Slow cooker white chocolate macadamia nut bread pudding
    1. Make sure your bread cubes are very dry so they soak up the cream/egg mixture as much as possible. I like to dry mine out in an even layer on a baking sheet overnight. If you don’t have time for that, you can bake them in the oven at 300 degrees Fahrenheit for about 10-15 minutes, or until they feel dry. 
    2. Strain the cream/egg mixture over the dried bread cubes so no stringy egg parts make their way into the bread pudding.
    3. Let the bread cubes soak up the cream/egg mixture for at least an hour before cooking.
    4. Because it's made in the slow cooker, there are no crunchy top pieces like you get when you make bread pudding in the oven. And some people may find the texture too mushy. But you can fix that if you brûlée the bread pudding! Just sprinkle some sugar on top and using a kitchen torch on it lightly. 


    Slow cooker white chocolate macadamia nut bread pudding

    Yield: 8 servings

    Ingredients

    • 4 large eggs
    • 1/2 cup (100 grams) granulated sugar
    • 1 Tablespoon vanilla extract
    • 2 cups heavy cream
    • 2 Tablespoons Challenge unsalted butter
    • 4 cups (6 ounces) challah, brioche, or French bread, cut into 3/4-inch cubes, crusts removed, dried out overnight
    • 4 ounces white chocolate, coarsely chopped
    • 3/4 cup (94 grams) macadamia nuts, chopped and toasted
    • 4 ounces white chocolate, grated

    Directions

    1. Beat eggs, sugar, and vanilla extract on low speed in large bowl. Beat in heavy cream on low. Set aside.
    2. Butter 4 or 5-quart slow cooker. Place bread cubes and white chocolate in slow cooker.
    3. Strain cream/egg mixture over bread cubes and stir to combine. Let stand at least an hour so bread absorbs cream/egg mixture.
    4. Sprinkle macadamia nuts on top. Cover and cook on low for 2 - 3 hours, or until bread pudding is mostly set but still slightly jiggly and edges are starting to turn golden brown. (If you prefer, bake in oven at 375 degrees Fahrenheit for 40 - 45 minutes)
    5. Optional: When done baking sprinkle top of bread pudding with more granulated sugar and use a kitchen torch to brûlée the top of the bread pudding.
    6. Sprinkle top of bread pudding with grated white chocolate. Cool 20 minutes and serve.


    Friday, March 5, 2021

    Oreo crème brûlée


    Crème brûlée is a rich vanilla custard topped with caramelized sugar. It gives the impression of a very fancy dessert—something you only order at a French restaurant. That's why many people are shocked to find out how easy it is to make. It involves just 5 ingredients: Heavy cream, vanilla, egg yolks, granulated sugar, and salt. Today I'm adding a 6th ingredient, Oreos, in honor of National Oreo Day on March 6.

    In this post, I'll walk through each of the steps to better explain the process. I hope it makes the dessert less intimidating.


    First step: Heat the cream just barely to a simmer. The reason we heat the cream is that later, when we combine the cream with sugar, the heat will help melt the sugar granules and ensure our custard isn't grainy. Also, by heating the cream, we can use it to slowly raise the temperature of the egg yolks so they aren't shocked by the intense heat of the oven later in the recipe.

    If you are using an actual vanilla bean, add it at this time. But if you're using vanilla extract, wait to add it until after you remove the saucepan from the heat. That's because vanilla extract is around 35% alcohol, and the alcohol burns off when it's heated.

    For Oreo crème brûlée, separate the Oreos and add the cream filling straight to the saucepan with the heavy cream as it heats on the stove. Crush the cookie portion and save the crumbs for later.

    Second step: Whisk together everything else. It's important to whisk the sugar and salt with the egg yolks because they help to act as a temperature buffer when we combine the egg yolks with the heated cream. We use just the yolks for a richer, creamier custard. The proteins in egg whites clump at lower temperatures than egg yolks, so if we used whole eggs, the custard would be firmer and less creamy.

    Third step: Temper the eggs. This is the process of slowly warming the temperature of the eggs so they don't scramble. We do this by slowly pouring some hot cream into the egg mixture while whisking. If you successfully tempered the eggs and combined the mixture with the hot cream, you shouldn't need to strain it. However, if you notice any clumps, strain the mixture through a sieve before baking.

    Fourth step: Place your ramekins in a large baking dish (use 2 if they don't fit in 1). I recommend using shallow ramekins because the custard cooks evenly, and there is more surface area for the caramelized sugar crust. Pour the custard in each ramekin and top with 1 Tablespoon of crushed Oreo cookies.

    Then pour hot water into the baking dish. You need enough hot water that it rises halfway up the ramekins. This is called a "water bath" or a "bain marie." The water will help to moderate the heat and it slowly raises the temperature of the custard so the edges don't overcook before the heat reaches the inside.

    Your crème brûlée is done when the edges are set but the center is still a little jiggly. Use an instant-read thermometer to check the temperature. It's finished when it registers 170 degrees Fahrenheit. Cooking time will vary depending on size and shape of your ramekin.

    Allow the custards to cool on a cooling rack for at least a half hour before moving them to the refrigerator. You should refrigerate them for at least 4 hours before serving to all for the custard to set.

    Fifth step: The most fun part of making this dessert is when we brûlée the crème. I highly recommend getting a small kitchen torch for this. You'll find uses for the torch other than crème brûlée. I got one for about $20. The benefit of using a torch is it applies heat quickly and directly so you can caramelize the sugar without heating the rest of the custard.

    If you're reading this and obtaining a torch isn't possible at this moment, heat the back of a metal spoon on your stove and lightly touch the sugar.

    Start with a light coat of sugar, about 1 teaspoon, and make sure the entire surface is covered. There shouldn't be any exposed custard. Use the kitchen torch to evenly cramelize the sugar, making sure to not hold it in one place for long so the sugar doesn't burn too much. Repeat this process a second time for a thicker sugar crust. Once you caramelize the sugar, serve the Oreo crème brûlée immediately.


    Oreo Crème Brûlée

    Yield: 6 servings

    Ingredients

    • 2 cups heavy cream
    • 8 Oreos, cookies and filling separated
    • 1 1/2 teaspoons vanilla paste or pure vanilla extract
    • 5 egg yolks
    • 1/2 cup (100 grams) granulated sugar, plus more for topping
    • 1/4 teaspoon salt

    Directions

    1. Preheat oven to 325 degrees Fahrenheit. 
    2. Heat heavy cream in saucepan over low heat. Add filling from Oreos to saucepan and bring to low simmer. 
    3. Remove from heat and stir in vanilla.
    4. Whisk together egg yolks, sugar, and salt.
    5. Temper cream into egg mixture by slowly pouring in 1 cup of cream while whisking. Continue to slowly pour cream into egg mixture until incorporated.
    6. Place ramekins in large baking dish. Pour cream mixture into ramekins.
    7. Crush cookies until texture is that of fine crumbs. Add 1 Tablespoon of cookie crumbs to each ramekin.
    8. Fill baking dish with enough hot water so it rises halfway up the sides of the ramekins.
    9. Carefully place baking dish into oven and bake for about 20 to 25 minutes. The edges should be set, but the centers should still be a little jiggly. Double-check with an instant-read thermometer. The custard is done when it reaches 170 degrees Fahrenheit.
    10. Remove baking dish from oven and place ramekins on cooling rack for about a half hour before covering and moving to refrigerator. 
    11. Chill custard for at least 4 hours and up to 2 days.
    12. Before serving, top each custard with a thin layer of sugar (about 1 teaspoon). Caramelize sugar with kitchen torch and serve immediately.


    Monday, March 16, 2020

    Pot of Gold Cake Balls

    This is a sponsored post by Challenge Butter, but the text and opinions are all mine. Thank you for supporting brands that make Kylee's Kitchen possible!

    I’m so proud of these cake balls. They’re chocolate pots of gold with rainbow cake inside. They’re probably my favorite thing I’ve ever made for St. Patrick’s Day. If I'm being honest, they were more time consuming than I originally thought, but they were definitely worth it!

    Cake balls always look adorable when they come from Starbucks or a bakery, but it seems they rarely turn out that pretty at home. There’s a lot that can go wrong, so I will share some tips I’ve discovered since the first time I attempted rainbow cake balls.

    First, a cake ball is cake crumbs mixed with frosting and dipped in chocolate. That being said, it’s important to recognize the top of the cupcake is a different texture than the rest of the cupcake, so I recommend cutting off the tops and not using them.

    Second, bigger is not always better, especially when it come to cake balls. If the cake ball is too big, it will be more likely to fall off the toothpick when you dip it. Try to make your cake balls about one inch in diameter.

    Third, don’t spend too much time swirling your cake ball around in the chocolate. Dip it and get it out of there. That’s the key to a smooth surface. Also, your chocolate coating will be lumpy if your burn it in the microwave. The best way to prevent that is to heat it up slowly. Initially, microwave the chocolate for 1 minute and stir, but after that, heat up the chocolate in 15-second intervals, stirring every time.

    Fourth, it’s tough to include every color of cake when making rainbow cake balls. I found it’s easier to grab a fairly large (size of a quarter) chunk of cake of every color, roll it together as one big ball, and then divide it in two, or three balls depending on how big it is.

    Fifth, if you find the chocolate coating on your cake balls cracking after you dip them in the chocolate, it’s probably because of the difference in temperatures between the cake ball and the coating. (You froze your cake balls so they’re very cold; meanwhile, you just heated up the chocolate, so it’s very hot.) When the cold cake ball warms, it expands and cracks the chocolate coating. Make sure to let your melted chocolate sit for a few minutes after heating it and pull your cake balls out of the freezer for a few minutes before dipping them.

    Also, when dipping your cake ball, make sure you coat the entire cake ball in chocolate and there are no leaks for the cake to pop out of.

    You’ll notice I made homemade Irish cream buttercream frosting for these cake balls. I thought the Irish cream would make these cake balls even more Irish. It was certainly very tasty! But you can use any buttercream frosting flavor your want, or if you’re trying to speed things up, you can purchase store-bought frosting. It’s up to you!

    I used Challenge butter in both the frosting and in the cake for this recipe. Challenge butter is 100% real cream butter with nothing artificial so you taste only the rich and natural sweet cream.


    Pot of Gold Cake Balls
    Ingredients
    For the Irish cream buttercream frosting
    • 1/2 cup Challenge butter, softened
    • 2 Tablespoons Irish cream
    • 1 teaspoon vanilla extract
    • 1/4 teaspoon salt
    • 4 cups powdered sugar
    For the cake balls
    • White cake mix
    • 2 eggs
    • 1/2 cup Challenge butter, melted
    • 1 cup milk
    • Red, yellow, green, blue, and purple food coloring
    • 1 (12-ounce) package dark cocoa candy melts (you can substitute with dark chocolate chips)
    • 1 Tablespoon oil (coconut oil, vegetable oil, anything to thin it out a bit)
    • Gold sprinkles
    Directions
    For the Irish cream buttercream
    1. Cream softened butter on medium speed for about 3 minutes. Add Irish cream, vanilla, and salt and mix thoroughly.
    2. Slowly add powdered sugar and beat with mixer until combined.
    3. If frosting is too thin, add more powdered sugar. If it's too thick, add more Irish cream (1 teaspoon). If frosting is too sweet, add more salt (1/4 teaspoon).
    4. Set aside while preparing cake balls
    For the rainbow cake balls
    1. Preheat oven to 350 degrees Fahrenheit
    2. Mix cake mix with eggs, butter, and milk. Divide the batter into 5 separate bowls. Color with a few drops each of red, yellow, green, blue, and purple food coloring.
    3. Pour cake batter into muffin tin. Each color will make about 3 cupcakes.
    4. Bake for 12 to 15 minutes or until a toothpick comes out clean.
    5. Cut off the tops of the cupcakes and crump each color into its own separate bowl.
    6. Add 2 to 3 Tablespoons of frosting to each bowl of cake crumbs and mix throughly until crumbs are consistency of coarse sand.
    7. Grab a small amount of each color of cake and roll it into a ball.
    8. Place the cake ball onto a baking sheet lined with parchment paper.
    9. Stick cake balls into freezer and let harden for about 10 minutes.
    10. Meanwhile, heat up candy melts with oil. Start with 1 minute, stir, and then continue to heat up in 15-second intervals, stirring each time, until chocolate is smooth.
    11. Remove cake balls from freezer. Place a toothpick in the top of each cake ball and dip in the chocolate, turning to coat. Lift the cake ball out of the chocolate and allow the excess to drip off before placing back on the parchment paper.
    12. Allow chocolate to harden. Remove the toothpicks and dip the top of the cake balls back into the chocolate. Quickly shake gold sprinkles on top and allow chocolate to harden again.
    13. Store cake balls up to 3 days.


    Wednesday, May 22, 2019

    Cookout Cookies are perfect for summer


    This is a sponsored post by Challenge butter, but the text and opinions are all mine. Thank you for supporting brands that make Kylee's Kitchen possible!

    I will always love themed treats, and I’ve made some pretty fun ones in the past for the Indy 500 / Memorial Day weekend. This year is no exception! I wanted to celebrate the official start of grilling season by making cute little grills.

    There are multiple steps to this, but nothing is too tricky, so stay with me! I started by making the easiest, tastiest chocolate cookies. It’s the same base recipe I use for my hot cocoa cookies. They’re soft, thick, and very chocolatey.

    Then I made a batch of classic buttercream with red food coloring. This will act as the flames in the grill.

    The third step is the trickiest: I made a picture of a grill grate using the paint program, and I printed it out, making sure it was the same size as the cookies. I then set a piece of wax paper on top and used melted chocolate to draw the design on the wax paper. It will harden after just a few minutes. That’s when you peel it off the wax paper and stick it on top of the frosted cookies.

    The last step is the most fun! Use your favorite candies to create shish kebabs to lay on top of the grill.

    If I’m being honest, this is not a quick recipe. But sometimes it’s just fun to spend time in the kitchen, and the final result is totally worth it!


    Cookout Cookies
    Ingredients
    For the cookies
    For the buttercream frosting
    • 1 cup Challenge butter, softened
    • 4 – 5 cups powdered sugar
    • 2 Tablespoons heavy cream
    • 2 teaspoons vanilla extract
    • 1/4 teaspoon salt
    • Red food coloring
    For the grill grates
    • Melted chocolate
    For the shish kebabs
    • Gummy bears, Mike & Ike’s, Hot Tamales, etc. cut into small pieces
    Directions
    For the cookies
    1. In a large bowl, combine dry cake mix, melted butter, and egg.
    2. Add cream cheese and beat until completely incorporated.
    3. Stir in chocolate morsels.
    4. Refrigerate dough for 30 minutes so it’s easier to shape into a ball.
    5. Once dough has been chilled, preheat oven to 350 degrees Fahrenheit.
    6. Form dough into 1-inch balls, place on baking sheet, and bake for 8 minutes.
    7. Allow to cool before frosting.
    For the buttercream
    1. Beat the butter on medium speed until smooth–about 2 minutes.
    2. Add heavy cream, vanilla, salt, and powdered sugar. Beat on low speed until combined, and then increase mixer to high speed for about 3 minutes.
    3. If frosting isn’t thick enough, add 1/2 cup more powdered sugar. If frosting is too thick, add more heavy cream.
    4. Frost cookies. I always prefer to use a piping bag, but you can just spread it on if you prefer.
    For the grill grate
    1. Print out picture of grill grate, and cut piece of wax paper to lay on top of it.
    2. Melt chocolate and add to Ziploc bag. Cut one corner and trace grate design on wax paper.
    3. Let harden and place on frosted cookies.
    For the shish kebabs
    1. Place small candy pieces on toothpick and place on top of grill grates.


    Monday, April 15, 2019

    Easter Garden Chocolate Cheesecake


    This is a sponsored post by Challenge butter, but the text and opinions are all mine. Thank you for supporting brands that make Kylee's Kitchen possible!

    Easter dessert may be my favorite dessert. I love incorporating spring themes like eggs, pastels, and bunnies. I also love using Easter candy! It's one of the many great things about this no-bake cheesecake.

    The chocolate cheesecake acts as the canvas for your Easter garden made with Oreo "dirt," shredded coconut "grass," and chocolate "bird nests." I love the idea of getting kids involved and seeing what design they create.

    Easter Garden Chocolate Cheesecake
    Yield: Serves about 6 people
    Ingredients
    • 2 (8-ounce) blocks Challenge cream cheese, softened
    • 1 cup powdered sugar
    • 1/2 cup sour cream
    • 1/2 cup heavy cream
    • 1 teaspoon vanilla extract
    • 8 ounces dark chocolate, melted and cooled to room temperature
    • 1 Oreo or chocolate graham cracker pie crust
    • 12 Oreo cookies, crushed
    • 1 cup sweetened shredded coconut
    • 3 drops green food coloring
    • Other Easter candies like chocolate eggs and peeps for decoration
    Directions
    1. Use mixer to beat cream cheese several minutes or until smooth.
    2. Add powdered sugar, sour cream, heavy cream, and vanilla extract. Mix until smooth.
    3. Stir in melted chocolate.
    4. Add cheesecake mixture to pie crust and smooth top with spatula.
    5. Sprinkle crushed Oreos on top of pie. This will be the "dirt."
    6. Mix coconut with food coloring and sprinkle on top of pie. This will be the "grass."
    7. Refrigerate until ready to serve. Once you're ready to serve, decorate with chocolate eggs, peeps, and other Easter candies.


    Pin It button on image hover