.png)


 |
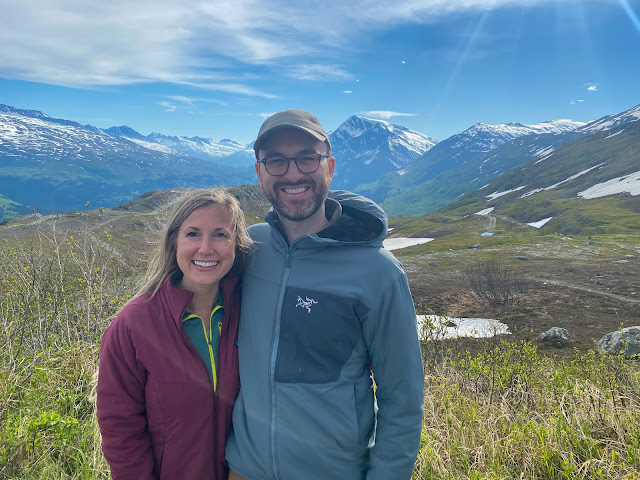
| Hiking in Hatcher Pass |
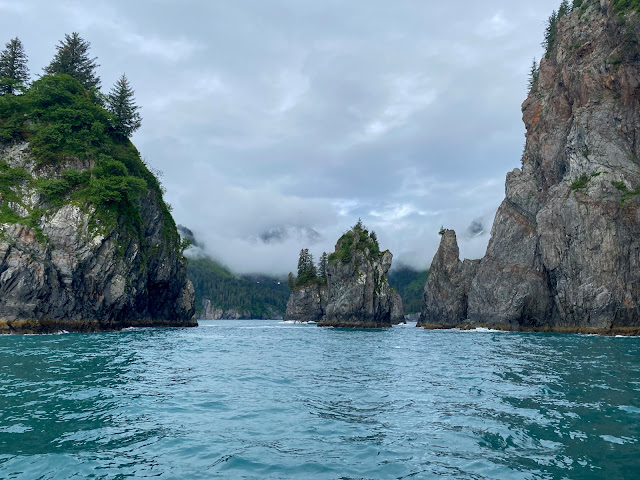
My husband and I were lucky enough to visit Alaska for nearly two weeks this summer. It was unlike anything I've ever experienced. I knew Alaska was going to be beautiful, but, just as everyone says, pictures don’t do it justice. There’s no way to grasp how breathtaking it is until you’re actually there. We experienced 360-degree scenic views everywhere we went.
If I’m being honest, this was a last-minute trip. Most people plan Alaskan vacations over a year in advance, but as you’re well aware, it’s been a strange time for travel. After getting vaccinated, we knew we wanted to travel somewhere, but we didn't know what would be open.
A few European countries just opened, but overseas travel seemed a little risky. We considered visiting Yosemite, Yellowstone, and Glacier National Park, but lodging at the parks books up way in advance. So I looked up “least visited national parks,” and saw 5 national parks in Alaska on the list. The pictures looked truly spectacular, and that's when I started thinking about a trip to Alaska.
I initially looked at visiting Alaska on a cruise because I know several people who have gone on Alaskan cruises and really enjoyed it, but there aren’t any cruises running at the moment because of the pandemic. Also, we’re not really “cruise people.” We like to make our own schedule. So that’s when I started researching how to explore the state by car.
I had a really hard time figuring out where to begin with planning a trip to Alaska. I have a “Type A” personality, so planning trips really stresses me out. I get so focused on making the best use of our time that I get wrapped up in researching the best places to stay, the best activities, the best places to eat, etc. I looked at Pinterest and some travel blogs, but the bloggers never said anything critical, so that didn't make any of our decisions easier.
Looking back on our trip, I know I didn’t discover the best of everything, but after reading thousands of reviews online, I feel like I have a pretty good idea, and I know what I would have done differently.
That said, the purpose of this post is to give honest, in-depth insight for anyone planning a trip to Alaska. I’m definitely not an expert, but I think my advice could really help anyone who wants to visit the “last frontier."
 |
| Hiking Matanuska Glacier |
Logistics
Time of year
We visited Alaska in the summer, so we got to experience the “midnight sun.” For roughly two months of the year, Alaskans enjoy nearly 24 hours of daylight because of the earth’s tilt toward the sun. I feel like not enough people talk about how big of a bonus this is for visitors in the summer months. I read about it before we left for our trip, but it didn’t really hit me until we landed at 11:30 p.m. and it looked like it was 4 in the afternoon.
The midnight sun allowed us the luxury of taking hikes in the late afternoon without worrying about whether we would be back before dark. We also traveled worry-free on winding, narrow mountain roads at 10 p.m.
Many people asked whether it was difficult to sleep. We didn’t have any problems falling asleep. I packed eye masks for us, and they did the trick. One thing that was really interesting, though, is I never realized how much darkness affects my body's sleep cycle. Normally, I get tired around 9:30 p.m. But with the long hours of daylight, I would be out and about until 11:30 p.m. and not even realize how late it was.
Flight
Getting to Alaska is quite a trek. There were no direct flights from Indianapolis, and they’re all red-eye flights. However, there were direct flights from Minneapolis, Dallas, Atlanta, Phoenix, and Seattle, so you’ll have a much easier time getting there if you live near one of those cities.
Car rental
If you’re not visiting Alaska via cruise, you will most likely need to rent a car. Unfortunately, a lot of rental car companies sold their fleets when the pandemic hit, and it is very hard to track down a rental car at a reasonable price in Alaska. We thought we were going to have to cancel our trip when we couldn’t find a rental car. Fortunately, we read about the company Turo, which is basically Airbnb but for cars. We rented a four-wheel-drive SUV for less money than we would have paid a rental car company. Overall, it was a positive experience. I would keep this company in mind even if you aren’t traveling to Alaska because apparently rental car shortages are a big problem across the U.S.
Packing
You definitely don't want to bring our finest clothes and jewelry with you to Alaska. It is rugged, and most activities are centered on the outdoors. Packing in layers is key to staying comfortable. You can start a hike in the morning with several layers on, and then shed layers as you warm up during the climb. Also, it’s very important to pack waterproof gear because at some point it will rain during your trip (that’s a fact), but if you’re prepared and have waterproof gear, it won’t matter. Normally, I'm. a chronic under-packer, but on this trip, I thought I packed just the right amount.
Here’s everything I packed.
- Waterproof shell
- Waterproof pants
- Mid-layer
- Fleece
- Base-layer
- 5 moisture-wicking short sleeve shirts
- 2 pairs of leggings
- 1 pair of lightweight hiking pants
- 1 pair of hiking shoes
- 3 pairs of hiking socks
- 5 pairs of regular socks
- 1 casual sweater
- 1 button-up shirt
- 1 dress
- 1 pair of jeans
- 1 pair of casual sneakers
- Sunglasses
- Cap
- Gloves
- Mosquito repellent bracelets
- Toiletries
- Eye mask
Regions
Alaska is an absolutely enormous state. It's hard to fathom how big it is. So you’ll need to decide which regions you want to prioritize. The state can be broken down into several regions: southeast Alaska, interior Alaska, western Alaska, northern Alaska, and south central Alaska.
Most cruise lines take visitors to southeast Alaska. Major cities in that region include Juneau, Sitka, Ketchikan, and Skagway. This region looks really beautiful, and I wish I could have visited. However, it is only accessible by boat or plane.
Denali National Park, Fairbanks, Talkeetna and North Pole are in the interior Alaska region. Even though Denali National Park is arguably Alaska’s most famous attraction, we chose not to visit. Several factors came into play when we made this decision.
First, Denali is in the middle of nowhere. It’s hundreds of miles from the closest major city (Anchorage or Fairbanks). And it isn’t a place you can explore well on your own. There is one road in the park, and it isn’t open to private vehicles. It’s only open to buses, and honestly, I just don’t really like bus tours. Apparently, you can see a lot of wildlife on the tours, but there’s no guarantee (it is wild, after all). And we saw a lot of wildlife everywhere we visited. Also, it isn’t a great hiking destination. There aren’t many marked trails in Denali, and most of the trails are less than 2 miles and near the park entrance. Everyone we spoke with in Alaska said we made the right decision not to visit.
Fairbanks is a popular city because it’s a great place to see the Northern Lights. But after talking with some locals, it sounds like that's all it has going for it, and you can’t ever see the Northern Lights in the summer. So we did not visit.
I’m sure western and northern Alaska are beautiful, but they were just too far.
We spent all of our time in south central Alaska. We visited Anchorage, Valdez, Girdwood, Soldotna, Seward, and Hatcher Pass.
 |
| Hiking Mount Alyeska |
Itinerary
Here is our exact itinerary. I highlighted the "highlights" of our trip in yellow. Below the bulleted list, I wrote very detailed descriptions of our daily activities.
Day 1
- Fly from Indianapolis to Phoenix (3 hours 40 minutes) and Phoenix to Anchorage (5 hours 45 minutes).
- Stay at Americas Best Value Inn & Suites Anchorage Airport (4360 Spenard Rd, Anchorage, AK 99517)
Day 2
- Pick up Turo rental car
- Eat at Snow City Cafe
- Visit reindeer farm
- Visit musk ox farm
- Drive from Anchorage to Valdez (5 hours 30 minutes)
- Eat at Nat Shack
- Stay at Robe Lake Lodge
- Hike Shoup Bay Trail
- Hike Mineral Creek Trail
- Drinks at Valdez Brewing
- Eat at Poor Betty's
- Stay at Robe Lake Lodge
Day 4
- Hike Goat Trail
- Visit Valdez Museum
- Visit Solomon Gulch Hatchery
- Eat at The Fat Mermaid
- Stay at Robe Lake Lodge
Day 5
- Drive from Valdez to Girdwood (5 hours 45 minutes)
- Visit Matanuska Glacier
- Eat at Jack Sprat
- Stay at Lily Studio Suite
Day 6
- Hike Mount Alyeska
- Eat at Seven Glaciers
- Drive to Soldtona (2 hours)
- Stay at Southern Bluff Bed and Breakfast
- Salmon fishing with Alaska Fish On charter
- Drive to Seward (1 hour 50 minutes)
- Stay at Van Gilder Hotel (308 Adams St, Seward, AK 99664)
- Hike Harding Ice Field Trail
- Eat at Apollo Restaurant
- Dessert at Sweet Darlings
- Stay at Van Gilder Hotel
- Ididaride Dog Sled Tour
- Visit Alaska SeaLife Center
- Eat at The Cookery
- Stay at Van Gilder Hotel
- Aialik Glacier Wildlife Cruise and Kayaking tour with Liquid Adventures
- Eat at Seward Brewing Company
- Stay at Van Gilder Hotel
Day 11
- Exit Glacier Ice Climbing trip with Exit Glacier Guides
- Eat at Apollo Restaurant
- Dessert at Sweet Darlings
- Stay at Van Gilder Hotel
Day 12
- Drive to Hatcher Pass (3 hours 25 minutes)
- Visit Alaskan Wildlife Conservation Center
- Eat at El Green-Go’s
- Stay at Hatcher Pass Lodge
- Visit Independence Mine State Park
- Hike April Bowl Trail
- Drive to Anchorage (1 hour 10 minutes)
- Drop off Turo rental car
- Fly from Anchorage to Minneapolis (5 hours 15 minutes) and Minneapolis to Indianapolis (1 hour 30 minutes)
Day 1
We arrived in Anchorage around midnight, and we stayed the night at Americas Best Value Inn & Suites Anchorage Airport. I picked this hotel because they offer a free shuttle from the airport, which is less than 2 miles away. It wasn’t anything special, but it was inexpensive and clean.
Day 2
We spent the first leg of our trip in Valdez, which is a small city at the head of a fjord in the eastern Prince William Sound. I was told Valdez is where the locals like to visit because it's absolutely stunning and not touristy.
We scheduled an Uber to pick us up from the hotel and take us to a nearby post office, which is where we picked up our Turo rental car.
Before departing Anchorage, we stopped at Snow City Cafe, which is a very popular breakfast restaurant in downtown Anchorage. There is always a line out the door, so prepare to wait if you visit. I sipped on the best coffee drink I’ve ever had (a rose latte) while we waited about an hour for our table. Everything on the menu sounded amazing! I ordered an omelette with reindeer sausage (when in Alaska, right?), and William had eggs Benedict with Alaskan red king crab cakes. It was delicious.
From there, we started the journey to Valdez. It was certainly a long drive, but it didn’t feel too bad because it was hands-down the most beautiful drive I’ve ever been on. Also, we made multiple stops on the way.
The first stop was at Williams Reindeer Farm. It was so much fun! We learned a ton about reindeer, and we also got to feed them. There were a lot of children on the reindeer farm tour, but there were plenty of childless adults as well. It definitely isn’t just for kids.
After stopping at the reindeer farm, we drove down the road to a Musk Ox Farm. Once again, it was a really informative and fun experience. And we learned an interesting story about Alex Trebek. Apparently, musk oxen were his favorite animals, and he visited the farm regularly. They called him the “godfather” of the farm, and if you donated enough money to “adopt” a musk ox, he signed the adoption papers. After his passing last year, they named a baby musk ox Trebek in his honor.
We also stopped at many vistas on the way to Valdez. At first, we stopped every few miles to take pictures, but then we realized ALL of the scenery was beautiful and pictures didn’t do it justice.
TIP: Glen Allen is the only place you can get gas (and food) during the drive, so make sure you fuel up, even if your tank is half full!
My favorite part of the drive was Keystone Canyon, which is just a few miles outside of Valdez. There are several really impressive waterfalls (Bridal Veil Falls and Horsetail Falls) right off the side of the highway.
We arrived at Robe Lake Lodge around 8:30 p.m. There are six private cabins and one main lodge with six rooms. The great room in the lodge has panoramic views of beautiful Robe Lake and the surrounding Chugach Mountains. We were the only people in the lodge our first night, and it was amazing having the entire place to ourselves. But it was full the next two nights, and we realized that six rooms sharing two bathrooms was a little inconvenient. However, I definitely wouldn’t have wanted to stay anywhere else. The motels in downtown Valdez were more expensive and looked very rundown.
After dropping off our luggage, we headed to downtown Valdez for dinner. Valdez is a very small and quirky town that revolves around the fishing and oil industries. The downtown area is just a few blocks long with some shops and restaurants, and it’s right on the harbor.
I spoke with a friend of a friend who lives in Valdez, and I was fortunate that she gave us some restaurant recommendations. Our first meal was at the Nat Shack, which is a food truck in the middle of downtown with outdoor seating. They serve tacos, burritos, and other Cal-Mex fare. Everything was really delicious—some of the best tacos I’ve ever had. We tried all the tacos, and the bahn mi was our favorite.
 |
| Williams Reindeer Farm |
 |
| Williams Reindeer Farm |
 |
| Williams Reindeer Farm |
 |
| Musk Ox Farm |
 |
| Stopped at scenic vista en route to Valdez |
 |
| Scenic vista |
 |
| Bridal Veil Falls |
 |
| Horsetail Falls |
 |
| Keystone Canyon |
 |
| Harbor in Downtown Valdez |
Day 3
We stopped at Prospector Outfitters to pick up bear mace before our first hike. This is an absolute must in Alaska. You don’t want to take any chances. We only saw one bear in the wild (it was in a tree), and we never had to use the bear spray, but I felt a lot safer having it.
The first hike we went on was Shoup Bay Trail. The first mile was lovely, but then the trail was totally overgrown. It was like a jungle, and we got pricked by stinging nettle and devil’s club. It was so bad we had to turn around.
Then we tried Mineral Creek Trail. The 14.5 mile trail offered pretty views, but it wasn’t a hiking trail. We just walked on a gravel road. In fact, cars passed us on the trail. We were disappointed, and it felt like a waste of a day.
It was pretty hot during our hikes (the temp said 75 degrees but it felt closer to 90 degrees by Indiana standards), so we went to Valdez Brewing when we finished to cool off and get a drink. It is a really excellent brewery! They had a fantastic and delicious selection of microbrews, as well as comfortable and spacious seating. Poor Betty’s, a po boy food truck, is in the brewery parking lot, and we each had a sandwich and chips. The sandwiches were pretty average. We were still hungry afterwards, so we went back to the Nat Shack to try their crunchwrap. The tacos are better, but it was still really tasty.
 |
| Shoup Bay Trail |
 |
| Shoup Bay Trail |
 |
| Shoup Bay Trail |
 |
| Shoup Bay Trail |
 |
| Mineral Creek Trail |
 |
| Mineral Creek Trail |
 |
| Mineral Creek Trail |
 |
| Mineral Creek Trail |
Day 4
We hiked the 4.5 mile Goat Trail in the morning. The trailhead is at the pullout directly across from Bridal Veil Falls, which is just outside of Valdez. It’s near the highway, but it doesn’t really affect the ambiance because the vegetation is so lush. This was the best hike we went on in Valdez, but as far as hikes go, it was just okay. It was pretty easy, and there were very few clearings in the forest to take in the view. The trail ends at a waterfall with the remnants of what used to be a bridge.
After the hike, we visited the Valdez Museum. Honestly, I wasn’t expecting much from the museum considering the town has a population of less than 4,000 and it is very remote, but I was shocked by how informative it was. There is a ton of history in the small town.
Gold miners were the first outsiders to settle Valdez in 1898. The prospectors sought a passage to Alaska’s interior in hopes of reaching the Klondike gold fields, so they attempted to HIKE ACROSS A GLACIER while pulling a sled with enough supplies to last them a year before they realized it was twice as long and way steeper than reported. Unfortunately (but expectedly), many of them died before they realized they were conned.
Fast forward to 1964—Alaska experienced the largest-ever recorded earthquake in North America. The epicenter was about 50 miles west of Valdez. It triggered tsunamis and landslides, and it wiped out the entire town. They realized the original townsite was built on unstable ground, so the residents relocated everything 4 miles east and started over.
Also, the Trans-Alaska Pipeline, which carries billions of barrels of oil from Prudhoe Bay oil field on Alaska’s North Slope, was built in 1975 after the 1973 oil crisis in the U.S., and it ends in Valdez.
And one more tragic part of Valdez’s history: In 1989, the Exxon Valdez oil tanker hit an iceberg in the Prince William Sound and spilled over 10 million gallons of crude oil. Hundreds of thousands of birds and sea creatures died because of the spill, and it’s considered the worst oil spill to ever occur worldwide.
There’s enough information to spend several hours at the museum!
Afterwards, we checked out the Solomon Gulch Hatchery. The scientists at the hatchery use an ocean ranching method to raise pink and coho salmon to stock the Prince William Sound. They incubate around 270 million salmon each year, and about 16 million salmon return each year in the summer to spawn. Apparently, the hatchery is a very exciting place to be when the salmon are returning because seals, sea lions, and bears congregate in the area for an easy lunch. But the salmon don’t return until July, so there was absolutely nothing going on when we visited. It was still interesting to learn about, though.
For dinner we visited The Fat Mermaid. From what I read online, it seemed like a tourist trap, and I was right. Everything about it was terrible. The hostess and servers acted annoyed that we there, and we the food wasn’t just bad—it was inedible. Just stay away.
 |
| Hiking Goat Trail |
 |
| Goat Trail |
 |
| Waterfall at end of Goat Trail |
 |
| Solomon Gulch Hatchery |
 |
| Harbor in downtown Valdez |
 |
| Downtown Valdez |
Day 5
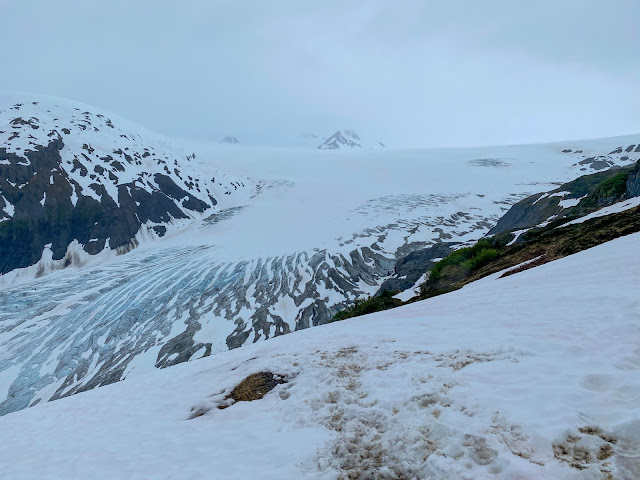
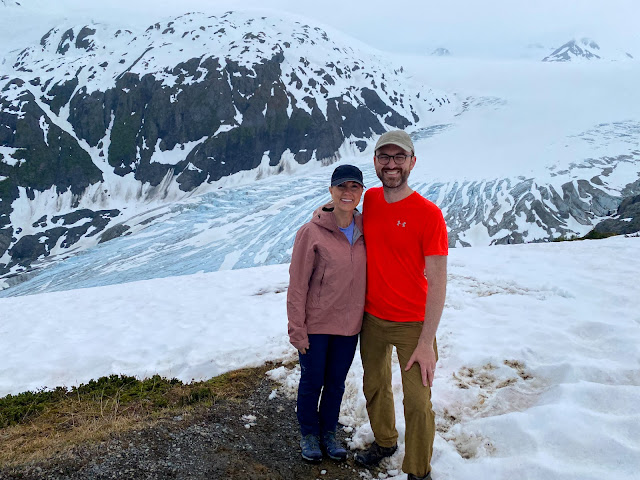
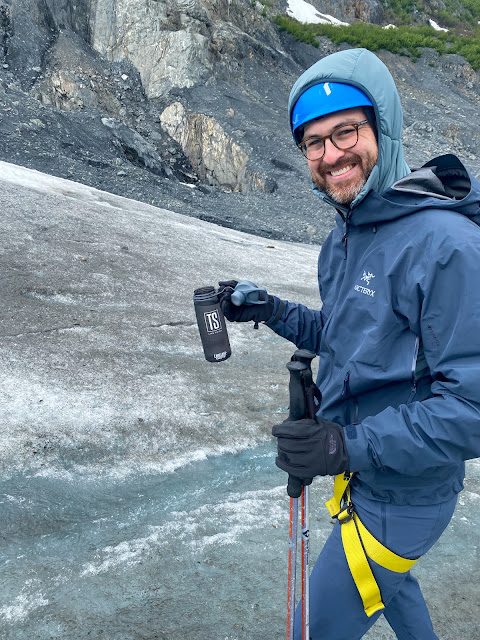
We woke up early to start the journey from Valdez to Girdwood. Girdwood is a small resort town about 45 minutes south of Anchorage. On the way back, we stopped about three hours into the drive at Matanuska Glacier, which is the largest glacier accessible by car. It’s a little over 2 hours from Anchorage, so it would make a great day trip even if you’re not driving through the area like we were.
Matanuska Glacier State Recreation Site is at milepost 101 on the Glenn Highway Scenic Byway. You have to travel down a long, windy. and narrow gravel path to get to the site. If it seems like you’re in the wrong place, you’re probably in the right place. I only recommend traveling on this road if you’re in an SUV and/or if your vehicle has four-wheel drive.
The only way to get up close to the glacier and hike on it is by signing up for a tour with the company Glacier Tours. They used to offer a self-guided tour, but now they only offer 3-hour guided tours. The cost was $60 per person. The guided tour was 100% worth it. Our guide was so incredibly knowledgeable about glaciers and geology, and we hiked places I would have never felt brave enough to hike on my own. It felt like were were on another planet.
Afterwards, we continued our drive to Girdwood. Our Airbnb, the Lily Studio Suite, was very nice. We had an excellent dinner at Jack Sprat. We shared the vegan nacho appetizer, which isn’t something we would normally choose, but it has rave reviews online. And we agree—it was delicious. We also shared a king salmon special and the halibut curry. It was definitely one of our best meals in Alaska.
 |
| Matanuska Glacier |
 |
| Matanuska Glacier |
 |
| Matanuska Glacier |
 |
| Matanuska Glacier |
Day 6
We planned to get up early and hike Mount Alyeska before heading to our next destination, Soldotna, but our plans were derailed when we discovered we had a flat tire. And of course, there was no spare tire in the vehicle. We tried to get a tow truck, but they said it would take them several days to reach us. Unfortunately, we couldn’t find the hole to patch the tire, and the nearest tire shop was 40 minutes away in Anchorage, so our only option was to drive on the flat to the nearest gas station (less than a mile away), fill up the tire, and drive it to Anchorage. Unfortunately, the tire was ruined by the time we got it to Anchorage, and we had to purchase a new tire.
Luckily, we were back on the road by 4 p.m. and since we didn’t have to worry about running out of daylight, we decided to hike Mount Alyeska after all. It wasn’t a very long hike, but it was pretty steep. The view at the top was worth it, though! There’s a really fancy restaurant at the top of the mountain called Seven Glaciers. You need to make reservations well in advance for the restaurant, which we did not do, but there’s a bar you can sit at with incredible panoramic glacier and water views. We shared a “sea-cuterie” board and oysters. They were the biggest and best oysters I’ve ever had.
Then we took the tram down the mountain. The tram ride is always free down. It's also free to go up if you have a reservation at the Seven Glaciers restaurant. Otherwise, you have to pay $35 to ride it to the top. That’s why we hiked. Also, we like hiking!
The tram and the restaurant are part of the Alyeska Resort, which is Alaska's largest ski resort. We didn't stay at the resort because some people online said it was cheesy and not worth it. But we walked through the resort and thought it was really lovely!
After our hike and dinner we still had to drive to Soldotna, but once again, it was a beautiful drive and it was light the entire time even though we didn’t arrive until 11 p.m. We stayed at Southern Bluff Bed & Breakfast, which is a very nice place run by an extremely nice couple. We were the only couple staying with them, and they said they decided to only host one family at a time.
 |
| Hiking Mount Alyeska |
 |
| Mount Alyeska |
 |
| Lookout at top of Mount Alyeska |
Day 7
The couple made us a very nice breakfast in the morning, and they granted us full access of their washer and dryer—even offering up detergent—which was so nice.
The reason we were in Soldotna was to go salmon fishing. I booked the fishing trip through a company called Alaska Fish On Charters. They have great reviews online, but I wouldn’t recommend using them. Our guide was a punk. He was only interested in flirting with the women in our group, and he didn’t help us with technique. He also spent the entire time bashing his bosses and talking about how much money he was going to make in the winter as a hog hunting guide in Arkansas.
Also, I know you can’t totally predict where and when to catch fish, but it was a little annoying because the guide kept talking about how his group in the morning caught the maximum amount of salmon within a few hours, but the company sent our group in the afternoon and only two people caught a fish. The guide said we probably didn’t go at a very good time, but the charter company chose our time! Oh well. Fortunately, I caught one of the fish!
After we finished fishing, we drove two hours to Seward, which is where we stayed the next 5 nights. I booked our stay at the Van Gilder Hotel. I chose that hotel because it was by far the cheapest, and there really weren’t any great lodging options. I think it’s because many people who visit Seward do it on a cruise ship. The nicest place was a Best Western, and it was over $100 more than the Van Gilder Hotel per night.
The Van Gilder Hotel prides itself on being a historical landmark, and it’s supposedly haunted. We were excited to stay there, especially because it was located right in the middle of downtown Seward. But we were very disappointed upon arrival.
Our room wasn’t actually in the hotel. It was in the annex, which is basically a floor of dorm-style rooms above a bar down the street from the hotel. And unfortunately, the bar was pretty noisy.
Also, we paid more money to book a room with a private bathroom, but there was only one men’s restroom and one women’s restroom in the annex. And the bathroom was never cleaned throughout our stay. Unfortunately, we couldn't change rooms because everything was booked in Seward.
TIP: Kenai Fjords National Park is in Seward, so it’s an extremely popular destination and everything books up quickly. Because I planned this trip at the last minute, there weren’t many lodging options available. But if you’re planning a trip to Seward far enough in advance, I highly recommend looking into an airbnb or bed and breakfast.
 |
| Fishing the Kasilof River |
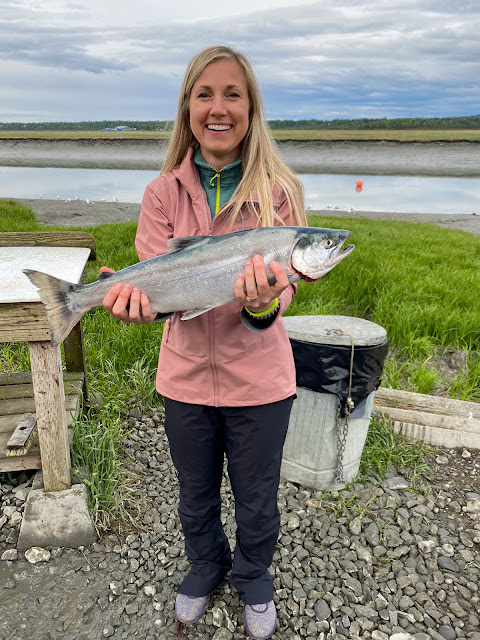 |
| The sockeye salmon I caught |
Day 8
We spent our first day in Seward hiking the Harding Ice Field Trail in Kenai Fjords National Park. This was definitely a highlight of the trip! The hike is suitable for people of all ages. It’s certainly challenging, but it really isn’t too difficult. Just make sure you wear appropriate gear (waterproof pants and jacket, hiking shoes, bear mace, mosquito repellant bracelets) and pack high-energy snacks and plenty of water. We saw some people hiking in sandals and jeans—not a good idea. It was about 9 miles long and took us about 6 hours to finish, and the views of the Harding Ice Field and the glacier are spectacular. This is a very popular trail that gets pretty busy, so I definitely recommend starting early.
When we went, there was still quite a bit of snow at the top that we had to hike through. I do not enjoy hiking through snow. But because it was too steep to hike down in the snow, we sat and slid down the side of the mountain. It was SO MUCH FUN and truly exhilarating.
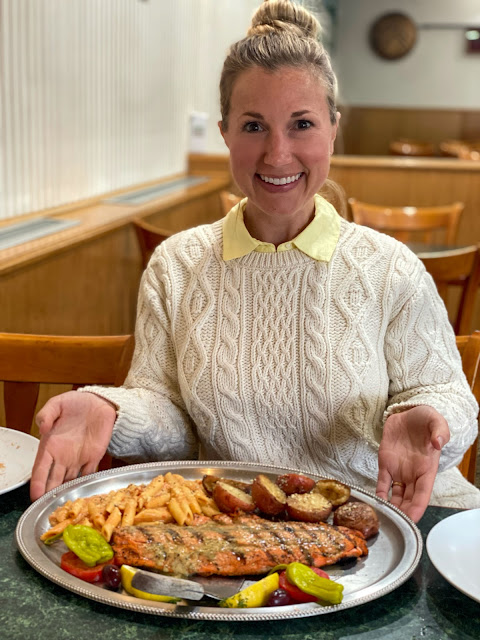
After our hike, we took the salmon I caught (we kept it in the refrigerator in our room) to Apollo Restaurant in downtown Seward. They cooked half of it (2 pounds) for us and served it with salad and pasta for $40. It’s amazing how different fresh-caught salmon tastes than the salmon I purchase at the grocery store in Indiana.
TIP: The restaurants in Seward and many other places in Alaska are extremely under-staffed, so make sure to make reservations or get to dinner early if you don’t want to wait 3 hours to eat.
Afterwards, we walked down the street to Sweet Darlings, which is a candy shop that also serves gelato. WOW WOW WOW! Best candy and best gelato I’ve ever had.
 |
| Hiking Harding Ice Field Trail |
 |
| Harding Ice Field Trail |
Day 9
We had a free day with nothing planned, so we checked out IdidaRide Sled Dog Tours. I didn’t know anything about the Iditarod before our trip, and it was fascinating to learn all about it at the Seavey homestead.
This is from their website: “On this tour, you’ll get to visit one of the oldest and most prominent sled dog racing kennels in the world, and spend time with Iditarod champion sled dogs. Mitch Seavey has run the famed Iditarod many times, winning the race in 2004 and 2013. His father was one of the founders of the race, and his son Dallas has won the race 4 times, setting the record in 2016.”
What was most surprising to me was how excited the dogs were to pull the sleds!
Afterwards we went to the Alaska SeaLife Center. It was very interesting and informative and a nice way to spend 2 hours when we had nothing else to do, but it definitely isn’t a “must-do” activity.
We had dinner at The Cookery that evening. It was probably the best meal we had during the entire trip. Definitely make a reservation in advance because it is very popular.
We shared oysters, shrimp toast, smoked halibut toast, halibut, king salmon, and a hot Dutch baby with cream cheese ice cream. Both halibut selections were our favorite.
 |
| Dogs at Ididaride lining up to pull sled |
 |
| Puppy from one of the spring litters |
 |
| Puppy at Ididaride |
 |
| Puppy putting on sled gear |
 |
| Dogs pulling sled at Ididaride |
 |
| One of the dogs that won the Iditarod |
Day 10
This was our favorite day of the entire trip! We booked the Aialik Glacier Wildlife Cruise and Kayaking tour with Liquid Adventures. We can’t say enough positive things about it. If you only spend money on one excursion, make sure it's this one! The day started with a 2-hour long wildlife cruise to the fjords where we saw whales, otters, puffins, and sea lions up close. Then we got off on a beach and paddled to a glacier, where we stopped and ate lunch. We saw harbor seals and paddled in crystal blue water through icebergs. It was spectacular. And not to mention our guides were incredibly knowledgeable about all things wildlife, kayaking, and glaciers, and they really made an effort to talk with us and get to know us. It was truly an unforgettable experience.
We ate at Seward Brewing Company for dinner. It was good, not great, but it’s the only brewery in Seward so it’s very popular.
 |
| Otters spotted on kayak trip |
 |
| Humpback whale |
 |
| Beautiful fjords |
 |
| Glacier |
 |
| We saw dozens of puffins |
 |
| Kayaking near Aialik Glacier |
 |
| Kayaking through ice near Aialik Glacier |
 |
| Kayaking near Aialik Glacier |
 |
| Kayaking near Aialik Glacier |
 |
| Sea lions |
 |
| Sea lions |
 |
| Orcas |
 |
| Orca |
Day 11
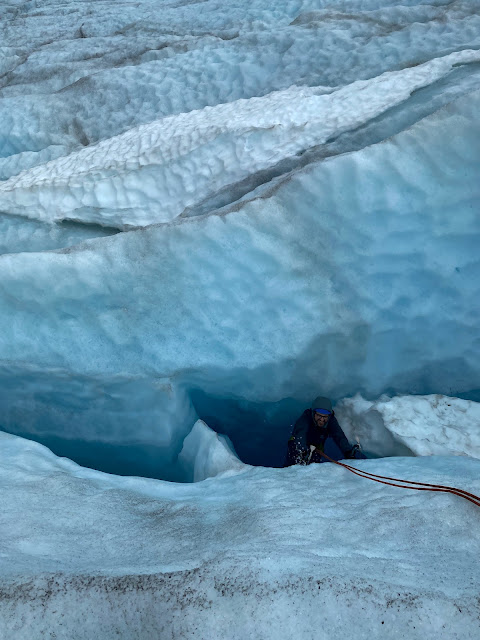
This was our second favorite day of the trip! We booked the Exit Glacier Ice Climbing trip with Exit Glacier Guides (this company also owns Liquid Adventures). We hiked on Exit Glacier in crampons, and the guides taught us basic ice climbing skills before sending us down the crevasses. It felt like I was in a different world when I was down in the crevasses. It required some upper body strength to climb out, but it wasn’t too difficult, and I felt very safe the entire time.
We went back to Apollo Restaurant to eat the rest of the salmon I caught (they only cooked half of it the first time and gave the rest back to us), and then we had Sweet Darlings again for dessert.
 |
| Climbing out of Exit Glacier crevasse |
 |
| Drinking glacier water |
 |
| The salmon I caught |
Day 12
We left Seward in the morning to drive to Hatcher Pass, which is about an hour north of Anchorage, for our last night.
We stopped at the Alaskan Wildlife Conservation Center (which is right outside of Girdwood) on the way there. It is a "sanctuary dedicated to preserving Alaska’s wildlife through conservation, education, research and quality animal care," and it came highly recommended by people we met in Alaska and reviews online. We saw a lot of native Alaskan animals like moose, caribou, bears, buffalo, porcupine, and wolves. We had a good time, and they do a lot of really good work for the Alaskan wildlife. But I don’t think you need to go out of your way to visit.
We passed through Anchorage on our way to Hatcher Pass, so we decided to stop for lunch. We went to El Green-Go’s, which is a taco food truck right across from Snow City Cafe. Holy cow, it was delicious! When we left for Alaska, I didn’t expect to have the best tacos of my life on this trip, but that’s exactly what happened. They smoke their meat right outside the truck and serve fresh halibut and salmon. We met a German man who visits Anchorage on a regular basis for business, and he said he eats there every day. I don’t blame him!
On to Hatcher Pass… it isn’t actually a town. It’s a road that runs through the mountains between Willow and Palmer. When we arrived, it felt like we walked onto the set of the Sound of Music. The views are truly spectacular. We stayed in the most adorable red cabin at Hatcher Pass Lodge, and it was perfect. There wasn’t any running water in the cabin, but there was a chemical toilet and they provided a big jug of water. Also, the main lodge has a shower and a modern toilet, which guests can use anytime. They also have a full-service restaurant and lots of board games in the lodge.
 |
| Black bear at Alaskan Wildlife Conservation Center |
 |
| Baby musk ox at Alaskan Wildlife Conservation Center |
 |
| Brown bear at Alaskan Wildlife Conservation Center |
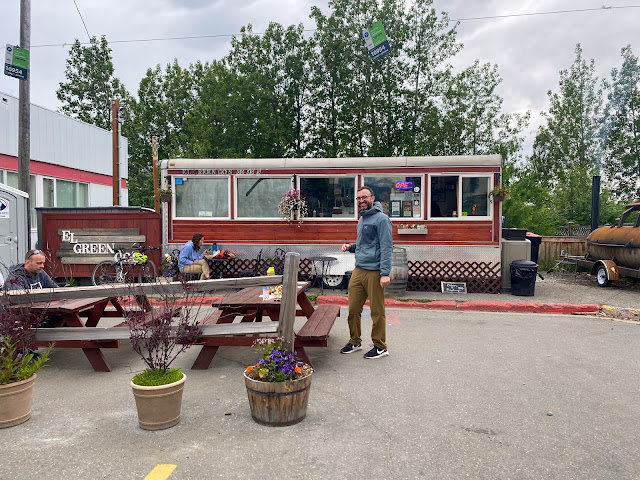 |
| El Green-Go's |
 |
| Hatcher Pass Lodge |
 |
| Our cabin at Hatcher Pass Lodge |
 |
| Looking outside our cabin at Hatcher Pass Lodge |
Day 13
We had breakfast in the lodge in the morning and then walked up to Independence Mine State Park, which is just about a mile from the lodge. It was once an operational mine, but it has since been restored into a park where visitors can see how the gold mines worked and what life was like to live in a mining community. It was really fascinating! Afterwards, we hiked the April Bowl Trail. The views were stunning, and it was such a fun hike!
There were actually a lot of hikes we wanted to do in Hatcher Pass, but we had to leave to make it to the airport on time. Knowing what I know now, I wish we would have stayed several nights in Hatcher Pass! It was a spectacular place! Unfortunately, there wasn’t a lot of information about it online.
We drove back to Anchorage and returned the Turo rental car to its owner, and then we took an Uber to the airport. We left Alaska on Sun Country Airlines at 9 p.m. and arrived in Minneapolis around 5 a.m. Then after a 4-hour layover, we left Minneapolis for Indianapolis and arrived back home around 12:30 p.m.
 |
| Independence Mine State Park |
 |
| Independence Mine State Park |
 |
| Independence Mine State Park |
 |
| Hiking April Bowl Trail |
 |
| Hiking April Bowl Trail |
 |
| Hiking April Bowl Trail |
 |
| Hiking April Bowl Trail |
 |
| Hiking April Bowl Trail |
 |
| Hiking April Bowl Trail |
 |
| Hiking April Bowl Trail |
 |
| Hiking April Bowl Trail |
 |
| Summit Lake near April Bowl Trail |
 |
| Summit Lake near April Bowl Trail |
 |
| View from Hatcher Pass Lodge |
What I would have done differently
Our trip to Alaska was truly a once-in-a-lifetime vacation. However, knowing what I know now, I would have done some things a little differently, and I wanted to share that info with you all in case you're looking for advice while planning a trip.
The biggest thing I would have done differently is skip Valdez and spend a few nights in Hatcher Pass instead. We had a good time in Valdez, and I'll never forget how beautiful it was. It's just that it's sooo far from everything else, and the hiking was very sub-par. We would have liked to have spent more time on the trails in Hatcher Pass and a few more nights in the little red cabin.
Also, I would have chosen a salmon fishing charter in the upper Kenai River (check the Cooper Landing area) and not driven all the way to Soldotna. This would have allowed us to stay an extra night in Girdwood, which was a really cute town.
If you have any questions about planning a trip to Alaska, don't hesitate to ask! Leave your question in the comment box below, and I will answer it as soon as possible!


