Thursday, January 18, 2024

Strawberry Marshmallow Popcorn Treats

 
This is a sponsored post by Challenge Butter, but the text and opinions are all mine. Thank you for supporting brands that make Kylee's Kitchen possible! 

I love popcorn so much. I'm not a movie person, but my husband is. And honestly, popcorn is the only reason I go to the movie theater. Usually we think about popcorn as a savory snack (my favorite is truffle powder and sea salt). But I love a sweet and salty treat, so I decided to make rice krispie treats but with popcorn.

This treat comes together quickly with just a handful of ingredients. I want to point out that I use popcorn kernels that I pop on the stove, not microwave popcorn. There is definitely a difference in taste between stovetop popcorn and microwave popcorn. I use a Whirley Pop (silly name, great device), but a pot with a lid works, too. Also, I use Challenge Salted Butter. I normally only bake with unsalted butter, but I like the salt here to contrast the sweetness.

I also added dehydrated strawberries for a fruity twist. And it makes them pink, which is perfect for Valentine's Day.

There is one important note I want to make before you jump ahead to the recipe. The marshmallow coating will soften the popcorn and make it slightly chewy. If you prefer the texture to be crispy and crunchy (like me), you can bake the popcorn bars at a low temperature to "dry" them out.


Strawberry marshmallow popcorn treats

Yield: 16 servings 

Time: About 45 minutes 

Ingredients 

  • 1/2 cup popcorn kernels (or about 12 cups popped popcorn)
  • 1 ounce dehydrated strawberries
  • 4 Tablespoons Challenge salted butter 
  • 10 ounces mini marshmallows 
  • 1 teaspoon vanilla extract 
  • 1/2 teaspoon kosher salt 
  • 1/4 cup white chocolate, melted 

Directions

  1. Coat 9x13-inch baking dish in nonstick spray. Set aside. 
  2. Pop kernels on stovetop (or desired method). Sort through popcorn and make sure there are no unpopped kernels. Set popcorn aside.
  3. Pulverize dehydrated strawberries in food processor until it resembles a powder. Set aside.
  4. In large pot over medium-low heat, melt butter. 
  5. Add marshmallows to pot and stir until melted. 
  6. Pour in dehydrated strawberry powder, vanilla extract, and salt. Stir until combined. 
  7. Add popcorn to pot and mix with spatula or wooden spoon until combined. 
  8. Dump popcorn mixture into prepared baking dish and lightly press down. 
  9. Drizzle white chocolate on top. 
  10. Allow mixture to harden for 30 minutes before cutting into bars and serving. 
  11. Optional: If you prefer crunchier popcorn texture, after drizzling with white chocolate, place baking pan into oven preheated to 250 degrees Fahrenheit for 10 minutes. Then allow to cool before cutting and serving. 
  12. Popcorn bars are best eaten same day they’re made. Store leftovers in airtight container at room temperature. 


Friday, January 12, 2024

Garlic Parmesan French Onion Soup


 This is a sponsored post by Challenge Butter, but the text and opinions are all mine. Thank you for supporting brands that make Kylee's Kitchen possible! 

French onion soup is such a classic dish, but sometimes it can feel really heavy due to the rich beef stock and high in sodium. 

The idea for this reinvented French onion soup recipe came because of my newest obsession, parmesan garlic stock. 

I've said it before and I'll say it again—parmesan rinds are equivalent to gold in the culinary world. A parmesan rind is the hard outer edge of a wheel of parmesan. It develops as the parmesan wheel ages. It's definitely edible, but I wouldn't recommend nibbling on it because it's pretty tough. However, they are one of the most incredible ingredients in soups and sauces—imparting a rich, umami flavor. So when you finish a wedge of parmesan, ALWAYS freeze the rind to save for later. Also, you can buy parmesan rinds at Whole Foods and probably other stores with specialty cheeses.


Okay, circling back to parmesan garlic stock—I did not create this, but I wish I had. I'm a huge proponent of making my own stocks because if you want a high-quality dish, you need to start with a good foundation. A parmesan garlic stock is similar to a vegetable stock (no bones), but it's just parmesan rinds, garlic, and some seasonings. I keep some in my freezer at all times. It is so incredibly delicious with many soups, especially French onion soup!

The key to French onion soup is properly caramelized onions. I start by melting Challenge unsalted butter in a Dutch oven. I use Challenge because there are no preservatives or hormones, so it's a product I really trust feeding my family. The caramelization process takes a really long time, upwards of 1 hour. But the good news is it's almost an entirely hands-off process. Then I add the parmesan garlic stock and let it simmer with the onions for another hour. Good soup can't be rushed! We need time for the flavors to meld. And that's pretty much it! I like to top with toasted French bread and gruyere. If you don't have oven-proof ramekins or bowls, you can use a kitchen torch!


Parmesan garlic stock

Yield: 1 gallon

Time: About 4 - 6 hours

Ingredients

  • 8 ounces yellow onion, small dice
  • 12 large garlic cloves, smashed
  • 1 pound parmesan rinds
  • 1.5 gallons cold water
  • 1 sachet d’epices (1 bay leaf, 1/2 teaspoon dried thyme, 1/4 teaspoon crushed peppercorns, 4 parsley stems)

Equipment needed

  • Large stockpot
  • Ladle
  • Fine-mesh sieve
  • Cheesecloth

Directions

  1. Place the onion and garlic in a stockpot and sweat until onion is soft and translucent.
  2. Add parmesan rinds to stockpot and cover with cold water. 
  3. Bring the water to a boil, reduce to a simmer and add sachet to simmering stock.
  4. Continue simmering stock for 4 to 6 hours.
  5. Strain stock through fine-mesh sieve into large bowl. Cool stock and refrigerate or freeze it.

Garlic Parmesan French Onion Soup

Yield: 6 cups soup

Time: About 2 1/2 hours

Ingredients

  • 4 Tablespoons unsalted Challenge butter
  • 3 pounds yellow onions, thinly sliced
  • 1 teaspoon Kosher salt
  • 1/4 cup balsamic vinegar
  • 2 quarts parmesan garlic stock
  • 8 sprigs fresh thyme
  • 2 bay leaves
  • Additional salt, ground black pepper to taste
  • 12 (1/2-inch) slices baguette (from about half a standard-sized baguette)
  • 6 ounces Gruyère cheese, grated

Directions

  1. Melt butter in Dutch oven over medium heat. Add onions and salt, stir and caramelize onions until golden brown, stirring occasionally. Turn down heat if onions brown too quickly. Expect caramelization process to take around 1 hour.
  2. Add balsamic vinegar to Dutch oven and deglaze pan.
  3. Pour in parmesan garlic stock. Bring to boil, reduce to simmer. Add thyme and bay leaves to simmering soup.
  4. Let soup simmer for 30-60 minutes to allow flavors to meld together. Remove bay leaf and thyme sprigs from soup. Season with salt and pepper to taste.
  5. In last 10 minutes of cooking soup, preheat oven to broil. Place baguette slices on baking sheet and toast until crispy, about 2 minutes on each side.
  6. Divide soup into ramekins or oven-proof bowls. Top soup with toasted baguette slices and cover surface with Gruyère. 
  7. Place onto baking sheet and slide into oven. Broil about 2 minutes or until cheese is melted and golden.
  8. Serve immediately.


Tuesday, January 9, 2024

Important slow cooker tips


Benefits of using a slow cooker
I think slow cookers have gotten a bad rep in recent years. As more technology comes out, I feel like some people turn their noses up at the use of slow cookers. But there's a reason they became so popular in the mid-1900s.

They free up stovetop space, they use less energy than an oven, they can be used unattended, and they don't heat your house in the summer.


Slow cooker temps
Probably the biggest disadvantage of the slow cooker is there is no temperature setting. Your options are warm, low, and high. The warm setting should hold the food above the "temperature danger zone" (140 degrees Fahrenheit). The temperature range for low and high will depend on your slow cooker.

Some slow cookers run hot, and others run on the cooler side. The best way to find out what kind of slow cooker you have is to fill your device halfway with room temperature water, stick a probe thermometer in the slow cooker, and monitor it for several hours.


Slow cooker tips:
1. Remember the tagline "set it and forget it"? That isn't a good strategy.

You can't put raw ingredients in the slow cooker and return 8 hours later to a delicious meal without having done anything else. Your food will be underwhelming and bland. A dish needs varied flavors and textures.

In most cases, you need to do some work outside of the slow cooker before cooking it and before serving it.

For example, you need to saute the aromatics (onions, carrots, celery), toast your spices, brown the meat, and deglaze (with wine if using) before cooking in the slow cooker. 

2. Also, cooking ingredients for a long time mellows flavors. I recommend adding additional bloomed spices, pouring in an acid (like lemon juice or apple cider vinegar), and stirring in fresh herbs before serving.

3. Don't lift the lid! It will cause the slow cooker to release heat and steam and it can affect the cooking time.


Saucy Slow Cooker Meatballs

Yield: Makes about 28 meatballs

Time: About 4 1/2 hours

Ingredients 

For the meatballs

  • 1 pound ground beef
  • 1/2 pound ground pork
  • 3/4 cup panko bread crumbs
  • 2 eggs
  • 1 shallot, minced
  • 2 garlic cloves, minced or grated
  • 1 Tablespoon dried mint (or 1/4 cup fresh mint, chopped)
  • 2 teaspoons ground cumin
  • 2 teaspoons dried oregano
  • 1 teaspoon kosher salt

For the sauce

  • 2 Tablespoons oil
  • 1 yellow onion, diced
  • 1 teaspoon kosher salt
  • 2 teaspoons ground cumin
  • 1 teaspoon ground cinnamon
  • 1/4 cup red wine, lemon juice, or wine vinegar
  • 56 ounces crushed tomatoes
  • 3 Tablespoons harissa
  • Optional: Fresh mint or parsley, chopped

Directions

For the meatballs

  1. In large bowl, break up ground beef and pork. Set aside.
  2. Mix together panko, eggs, shallot, garlic, mint, cumin, oregano, and salt.
  3. Use hands to carefully combine ingredients with meat.
  4. Roll meat mixture into golf-ball sized meatballs.
  5. Heat oil in skillet over medium heat. Place meatballs in skillet, making sure not to crowd pan, and brown meatballs. Set meatballs aside.

For the sauce

  1. Add onion and salt to skillet and cook until soft and translucent. 
  2. Add cumin and cinnamon to skillet and cook for about 1 minute.
  3. Deglaze skillet with wine. Add contents of skillet to slow cooker.
  4. Pour crushed tomatoes into slow cooker and mix.
  5. Add meatballs to slow cooker and cover in sauce.
  6. Cover slow cooker and cook on low for 4 hours, or until meatball internal temperature registers 160 degrees Fahrenheit.
  7. Mix harissa into sauce, top with fresh herbs, and serve with orzo or bread.

Slow Cooker Harissa Eggplant

Yield: Makes about 4 (1/2 cup) servings

Time: About 4 hours

Ingredients

  • 1 1/2 pounds eggplant, peeled and cubed
  • 1/2 cup harissa, divided
  • 1/4 cup extra virgin olive oil
  • 4 Tablespoons lemon juice (1 lemon), divided
  • 1 teaspoon kosher salt
  • Optional: Yogurt, crumbled feta, fresh mint or parsley

Directions

  1. Combine eggplant, 1/4 cup harissa, 2 Tablespoons lemon juice, and kosher salt in slow cooker.
  2. Cover and cook on low for about 6 hours or until eggplant is very tender.
  3. Add remaining harissa and lemon juice to slow cooker and stir.
  4. Serve with optional toppings.


Thursday, December 21, 2023

Grinch pistachio thumbprint cookies


 This is a sponsored post by Challenge Butter, but the text and opinions are all mine. Thank you for supporting brands that make Kylee's Kitchen possible! 

I can't remember where (maybe on TikTok) I saw someone add food coloring to their thumbprint cookie recipe to make grinch cookies. I loved the idea! But then I thought, what about instead of using food coloring, I used pistachio pudding mix. And thus this cookie recipe idea was born!


I love pistachio-flavored treats, and there are actually a lot of benefits to using pudding mix in cookies. Many people add cornstarch to their cookies for extra softness and an added lift because cornstarch retains moisture. But if you add to much cornstarch, your cookies may taste funky. Fun fact: A package of instant pudding mix contains cornstarch. So when you add the mix to your recipe, you’re guaranteed the perfect amount.

I will say, once the dough bakes, it loses some of its green coloring, so if you want the cookies to be a more vibrant green color, I recommend adding a few drops of green food coloring after mixing in the extracts.

I always use Challenge unsalted butter in my cookie recipes. Using high-quality butter, like Challenge, has a big impact on the richness, flavor, and structure of the cookies.


Grinch pistachio thumbprint cookies

Yield: Makes about 2 dozen cookies

Time: About 30 minutes

Ingredients

  • 2 cups (240 grams) all-purpose flour
  • 1 teaspoon baking powder
  • 1/2 teaspoon salt
  • 1 cup (2 sticks) Challenge unsalted butter
  • 3/4 cup (150 grams) granulated white sugar
  • 1 (3.4 oz) package instant pistachio pudding mix
  • 2 large egg yolks
  • 1 teaspoon vanilla extract
  • 1 teaspoon almond extract
  • Optional: Several drops green food coloring, if desired
  • 1/4 cup raspberry or strawberry jam

Directions

  1. Measure flour, baking powder and salt in medium bowl. Combine and set aside.
  2. In large bowl, cream butter and sugar until light and fluffy.
  3. Add instant vanilla pudding package and beat until well blended.
  4. Beat in egg yolks and extracts. 
  5. If you want a more vibrant green color, add just a few drops green food coloring.
  6. Add flour mixture to wet ingredients and mix until just incorporated.
  7. Cover dough and chill in refrigerator for at least one hour.
  8. Remove dough from refrigerator.
  9. Preheat oven to 350 degrees Fahrenheit.
  10. Roll dough into balls (the size of 2 tablespoons) and place on baking sheet.
  11. Create heart shape in center of each ball using two thumbprints joined at bottom. Fill heart indent with jam.
  12. Bake for 8 to 10 minutes.
  13. Remove from oven and cool on cookie sheet for several minutes before moving to a wire rack to cool completely.
  14. Store cookies in airtight container for up to 5 days.


Tuesday, December 19, 2023

Gingerbread sheet pan pancakes


This is a sponsored post by Challenge Butter, but the text and opinions are all mine. Thank you for supporting brands that make Kylee's Kitchen possible! 

I love eating pancakes, especially on special occasions. But what I don't love is standing over the stove making pancakes. The pancake maker is stuck standing over the skillet watching everyone else eat fresh, hot pancakes. And do you know who the pancake maker in my house is? ME! And I do NOT like eating last. 

My solution: sheet pan pancakes! Instead of cooking pancakes one at a time on a skillet, I pour all the batter into a well-greased sheet pan and bake it. Due to the size of the sheet pan, the pancake comes out at about the same thickness as pancakes made on the stove. Bonus: You can use a cookie cutter to make different shapes out of the sheet pan pancake, like what I did here with the gingerbread men.

The key ingredients that make these pancakes taste like gingerbread are ground ginger, ground cinnamon, ground allspice, and molasses. But my "secret" ingredient is Greek yogurt. Greek yogurt provides a lot of benefits. The yogurt reacts with the leavening agents to make the pancake extremely thick and fluffy. It also adds moisture and protein.

When mixing the liquid ingredients, I recommend starting with the Greek yogurt, since it's the thickest ingredient, and then slowly adding and mixing the other liquid ingredients into the yogurt.

One final note: You'll notice the ingredient list shows "butter, melted and cooled." All that means is to not mix boiling butter with the rest of your ingredients because it may cause them to curdle. It's also important to use a good quality butter. That's why I recommend using Challenge unsalted butter for the best results. Challenge butter is made with 100% real pasteurized sweet cream and no artificial ingredients.

Gingerbread sheet pan pancakes

Yield: Makes about 8 servings

Time: About 25 minutes

Ingredients

  • 3 cups (360 grams) all-purpose flour
  • 1 Tablespoon ground ginger 
  • 1 Tablespoon ground cinnamon
  • 2 teaspoons baking powder
  • 1 teaspoon baking soda
  • 1 teaspoon salt
  • 1/2 teaspoon allspice
  • 1 1/2 cups (340 grams) whole fat Greek yogurt
  • 1 1/4 cup (300 milliliters) milk
  • 3/4 cup (180 grams) molasses
  • 8 Tablespoons (1 stick) Challenge unsalted butter, melted and cooled
  • 2 large eggs, room temperature
  • 2 teaspoons vanilla extract

Directions

  1. Preheat oven to 425 degrees Fahrenheit. Prepare 13x18-inch baking sheet with nonstick spray. Set aside.
  2. Combine dry ingredients in large bowl. Mix wet ingredients in separate large bowl.
  3. Add wet ingredients to dry ingredients and mix until fully combined. A few lumps are okay.
  4. Pour batter onto sheet pan and spread evenly. 
  5. Bake for 10-12 minutes or until center springs back when touched.
  6. Remove from oven and serve. 

Friday, December 8, 2023

Black cocoa brownies


This is a sponsored post by Challenge Butter, but the text and opinions are all mine. Thank you for supporting brands that make Kylee's Kitchen possible! 

Have you ever thought about why Oreos have an intense chocolate flavor but they're black, not brown. The answer is black cocoa powder. And that's what I use in my favorite brownie recipe.

A lot of people have very strong opinions as to what makes the perfect brownie. I can't cater to everyone, and since I'm the one making these brownies, I'm catering to myself. My preference: fudgy brownies with an intensely deep chocolate flavor. And this may be controversial, but. I actually don't like a crinkly top. It's too messy!  


First, I want to point out this recipe only uses cocoa powder, not melted chocolate. I prefer cocoa powder brownies for several reasons. 

1) They're softer. The fat in cocoa powder brownies comes from butter. The fat in brownies with melted chocolate comes from a combination of butter and the cocoa butter in the chocolate. Butter is soft at room temperature, whereas cocoa butter is not. Think of a chocolate bar left out on the counter versus a stick of butter left out. Thus, you get softer brownies. I recommend using Challenge unsalted butter for the best results. Since butter is such a big part of this recipe, it's very important to use the best quality butter. Challenge butter is made with 100% real pasteurized sweet cream and no artificial ingredients.

2) More control. Different chocolates have varying levels of sugar, cocoa butter, etc. that could greatly impact the final product. Cocoa powder is pretty standard across the board, which is great because we do not want variability.

So let's talk cocoa powders. There are 3 main types of cocoa powder: Natural cocoa powder, Dutch-process cocoa powder, and black cocoa powder. All cocoa powder is made from bits of hulled and roasted cacao beans called nibs, and they're all unsweetened in powder form. 


Natural cocoa powder retains the natural acidity of the cacao beans. It is lighter in color and milder in taste. It's the classic chocolate flavor you think of and the type of cocoa powder used in your grandma's favorite recipes.

Dutch-process cocoa is natural cocoa treated with an alkalizing solution, usually potassium carbonate. The solution neutralizes the acidity, resulting in deeper, smoother chocolate flavor.

Black cocoa powder is even more intensely treated with an alkaline solution resulting in the deepest black color. The best way to describe it's flavor-profile is Oreo cookies.

Technically, yes, they are interchangeable, but because natural cocoa powder is acidic and the other two aren't, it will affect the chemical leaver if one is present in the recipe. ALSO, it's important to think about what flavor-profile you're trying to achieve before you choose your cocoa powder.


A few more tips when it comes to making these brownies: 

1) Use a metal or aluminum pan. They cook more evenly. Glass and ceramic pans take longer to heat, and it will significantly affect the baking time. And line your pan with parchment paper so the brownies will easily lift out.

2) The method for mixing these brownies is to whip the eggs, sugar, vanilla, and salt for several minutes until the mixture is thick, pale batter. When you lift up the head of the mixer, the batter should fall down like ribbons and briefly stay on the surface before sinking down. This is called the ribbon stage. It incorporates a lot of air into the batter, and this is the only leavening agent in this recipe.

Black cocoa brownies

Yield: Makes 9 brownies

Time: About 1 hour

Ingredients

  • 2 large eggs, room temperature
  • 1 1/4 cup granulated sugar (250 grams)
  • 1 teaspoon vanilla extract
  • 1/2 teaspoon kosher salt
  • 12 Tablespoons (1 1/2 sticks) Challenge unsalted butter, melted and cooled
  • 1/2 cup all-purpose flour
  • 1/2 cup (50 grams) Dutch-processed cocoa powder
  • 1/2 cup (40 grams) black cocoa powder
  • Sea salt for garnish

Directions

  1. Preheat oven to 325 degrees Fahrenheit and line 8x8-inch baking pan with parchment paper with 2-inch overhang on 2 sides. Set aside.
  2. Using stand mixer, whip eggs, sugar, vanilla extract, and salt on medium speed for about 2 - 3 minutes or until mixture is fluffy and pale and when you lift up the mixer head, the batter falls back in thick trails like a ribbon.
  3. Slowly mix in butter.
  4. Sift together flour and both cocoa powders and fold into batter until just combined.
  5. Pour batter into baking pan and bake for 30 - 35 minutes, or until toothpick inserted in center comes out mostly clean with some wet crumbs. Thermometer inserted into center should read 195 degrees Fahrenheit. Immediately sprinkle with sea salt.
  6. Allow brownies to cool in pan for at least 30 minutes before removing by lifting out using overhanging parchment paper.
  7. Cut into 9 squares and serve.


Thursday, November 30, 2023

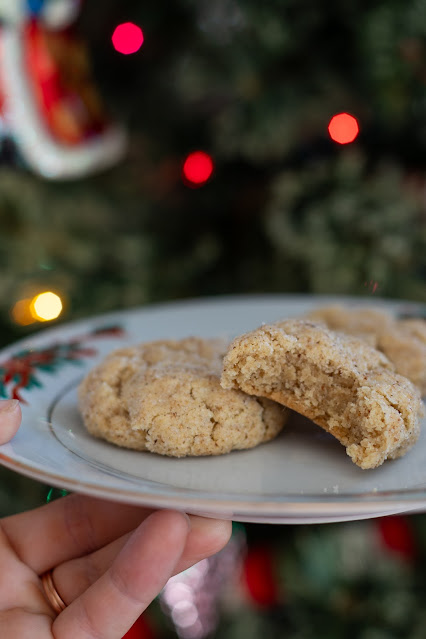
Eggnog snickerdoodles

This is a sponsored post by Challenge Butter, but the text and opinions are all mine. Thank you for supporting brands that make Kylee's Kitchen possible! 

Eggnog can be divisive. Bad eggnog tastes like thick sludge, kind of like Pepto-Bismol. I find that is most often the case with store-bought varieties. Good eggnog, on the other hand, is like a frothy drinkable custard. The ingredients are basically the same ingredients in ice cream: eggs, milk/cream, sugar, warm spices (plus booze). 

One thing that isn't divisive--eggnog-flavored snickerdoodles. These cookies have the same characteristics everyone loves about snickerdoodles (cracked surface, soft and chewy center, a little tangy, and cinnamony) with the addition of fresh nutmeg and booze. And I'm not talking about rum extract. I use the real thing in this recipe.


Let's discuss some ingredients in this recipe:

Brown butter: When we brown butter, the water in the butter evaporates. Two sticks of butter weigh 226 grams. When I weighed the butter after I browned it, it weighed 181 grams. That’s 45 grams of water evaporation. That’s important because we’re going to replace the butter's water content with booze. Additionally, if you're taking the time to brown butter, it's imperative you use a good quality butter. I always use Challenge unsalted butter. Challenge butter is made with 100% real pasteurized sweet cream. That’s it. Nothing artificial or synthetic. 

Bourbon: Eggnog is a boozy drink, and I wanted actual booze, not rum extract, in the dough. But if you add too much liquid to cookie dough, it can cause the cookies to spread too much. But because we evaporated the water from the butter, we now have room for liquid in the form of bourbon. Make sense? You can use either bourbon or rum. I used bourbon because it's what I had.

Freshly grated nutmeg: Ground nutmeg has a pretty short shelf life before it loses potency, whereas whole nutmeg can last several years. And who knows how long the ground nutmeg has been in the jar before you pick it up from the store. That said, freshly grated nutmeg is important for achieving the best flavor!

Cream of tartar: This is what differentiates a snickerdoodle from a sugar cookie and gives them a distinctive, slightly tart (hence "tartar") taste. Also, it prevents the sugar from crystallizing in the cookies, resulting in a soft, chewy texture.

Eggnog snickerdoodles

Yield: Makes about 24 cookies

Time: About 45 minutes

Ingredients

For the cookies

  • 1 cup (2 sticks) Challenge unsalted butter
  • 450 grams (3 3/4 cups) all-purpose flour
  • 2 teaspoons cream of tartar
  • 1 1/4 teaspoons nutmeg, freshly grated
  • 1 teaspoon ground cinnamon
  • 1 teaspoon baking soda
  • 1 teaspoon kosher salt
  • 350 grams (1 3/4 cup) granulated sugar
  • 1 large egg and 2 egg yolks, room temperature
  • 6 Tablespoons bourbon or rum
  • 1 teaspoon vanilla bean paste

For the coating

  • 50 grams (1/4 cup) granulated sugar
  • 2 teaspoons freshly grated nutmeg

Directions

  1. Heat butter in stainless steel pot with high sides over medium-high heat. Stir frequently. Butter will sizzle and foam. Once milk solids look golden brown, remove pot from heat and pour butter into mixing bowl. Place in refrigerator and allow to cool and solidify.
  2. Preheat oven to 350 degrees Fahrenheit and prepare two baking sheets with nonstick spray, silicone mats or parchment paper.
  3. In medium bowl, whisk together flour, cream of tartar, nutmeg, ground cinnamon, baking soda, and salt. Set aside.
  4. Remove mixing bowl with butter from refrigerator. Add sugar and beat on high until light and fluffy, about 2 minutes. Scrape down sides of bowl.
  5. Add egg and egg yolks one at a time with mixer on low speed. Add bourbon and vanilla bean paste and beat for another minute. Scrape down sides of bowl.
  6. Add flour mixture to bowl. Mix on low speed until flour is just combined. Set dough aside.
  7. Make coating by combining sugar with nutmeg in small bowl.
  8. Measure out 35 grams of dough, about the size of a golf ball, and roll into ball. Roll dough ball in coating. Use spoon to coat dough balls a second time, ensuring they're completely covered.
  9. Bake cookies for about 12-14 minutes or until cookies are just set. Rotate pans halfway through bake time.
  10. Remove baking sheet from oven and cool for several minutes before moving to wire rack to cool completely.
  11. Store cookies in airtight container for up to 5 days.

Pin It button on image hover